
4" Solid Concrete Block Facing in Sketchup
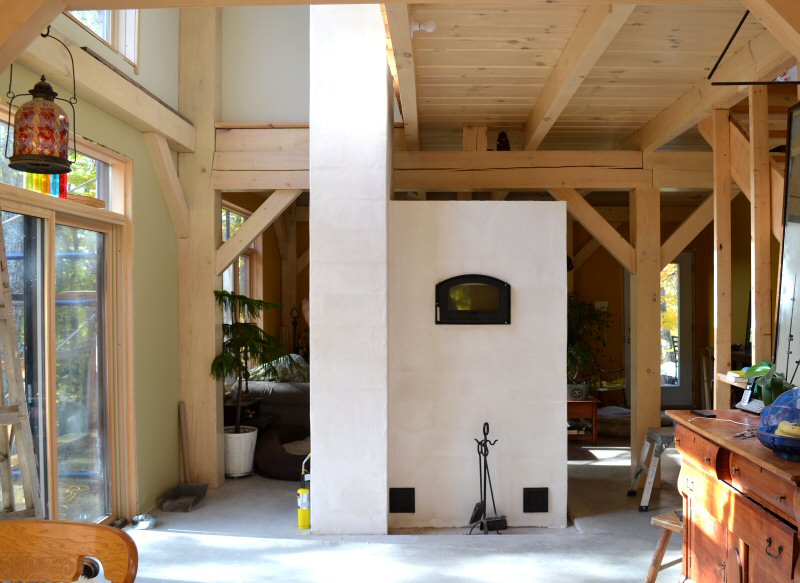
The concept for this project was to offer the client a low cost facing option.
This meant greatly reducing the on-site labor by pre-cutting the 4" concrete facing in the shop.
Sketchup allowed building an exact 3-D model, in about 1/4 the time that would be required in Autocad.
This made the whole project feasible.
The 4" blocks will be glued together with rapid thinset, and skinned with glass mesh and white thinset.
This will provide a simple stucco finish, that serves as an ideal base for finish plaster, tile, or thinstone.
The client plans to finish this heater in thinstone.
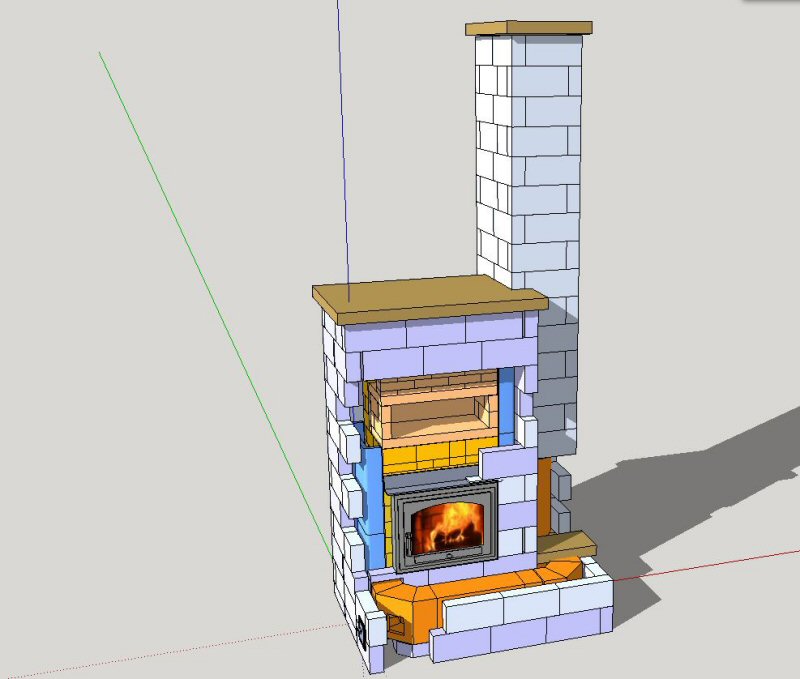
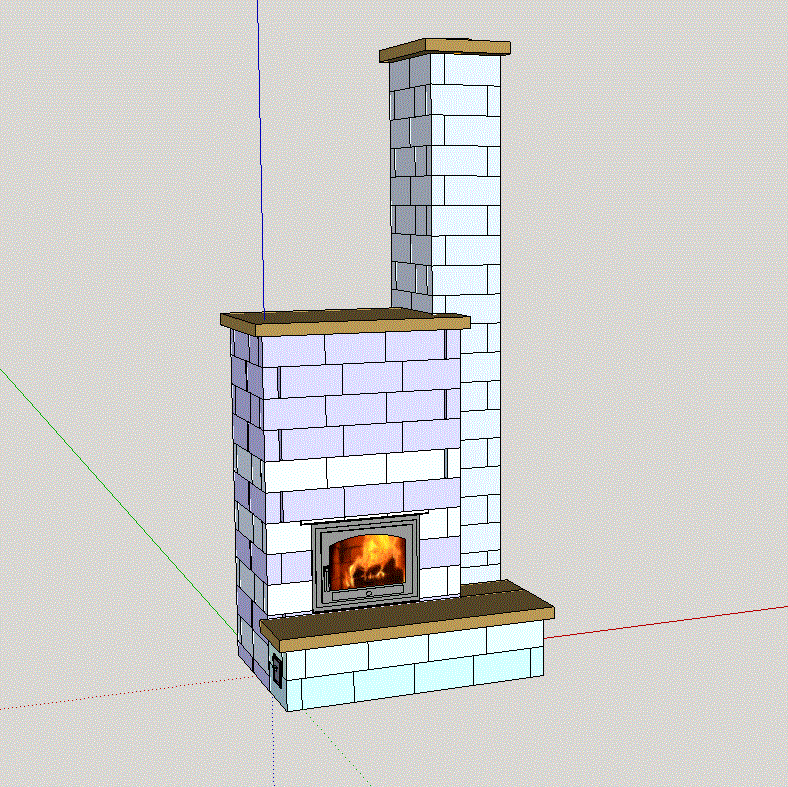
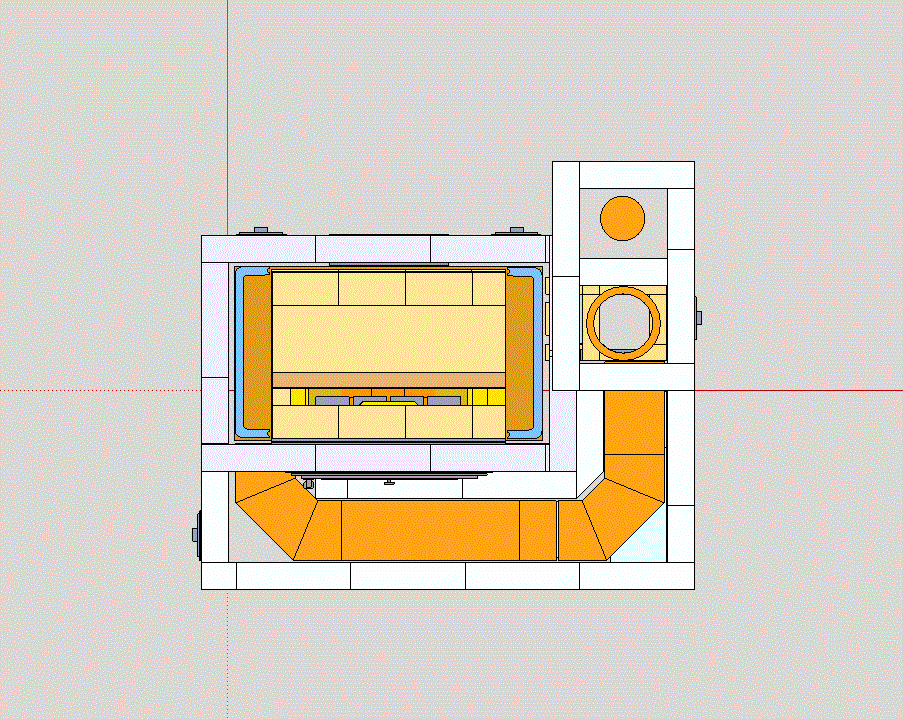
Sketchup model, including Heatkit core and precut heated bench.
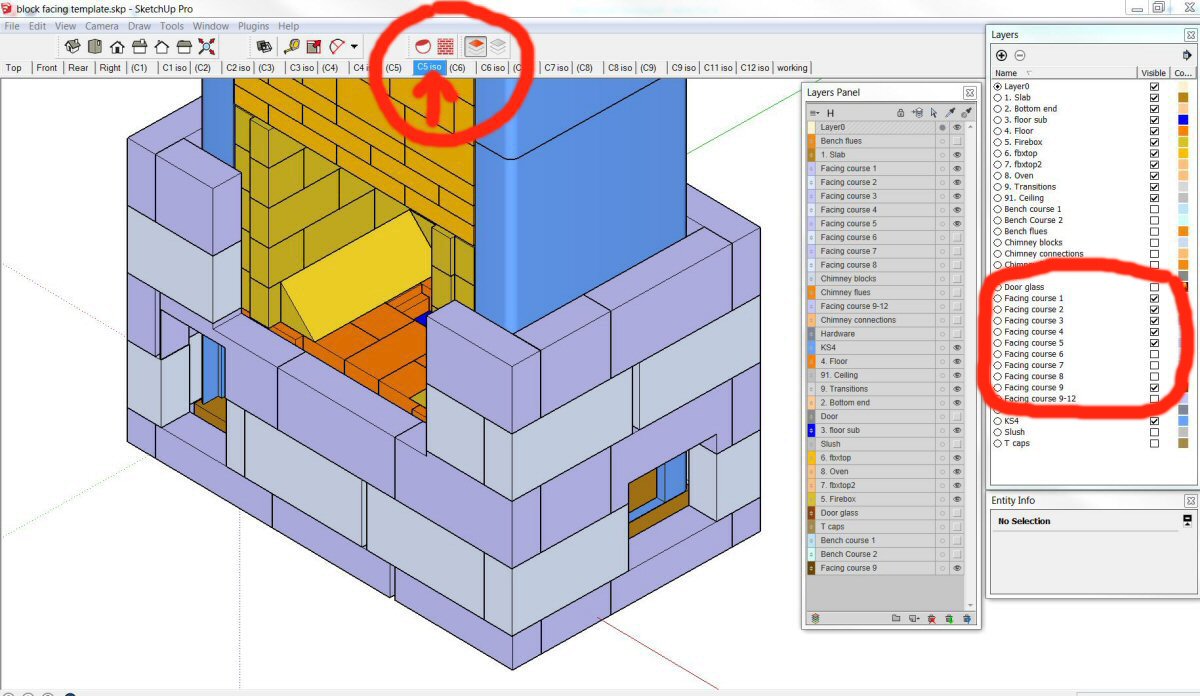
In
the Sketchup model, each course of blocks is on it own layer, which can
be turned on and off (highlighted in red at the right).
Highlighted
at the top, you can create any number of separate "scenes" with
individual settings for the view, which layers are visible, etc.
In this scene (C5 iso) we are looking at an isometric view of course 5.
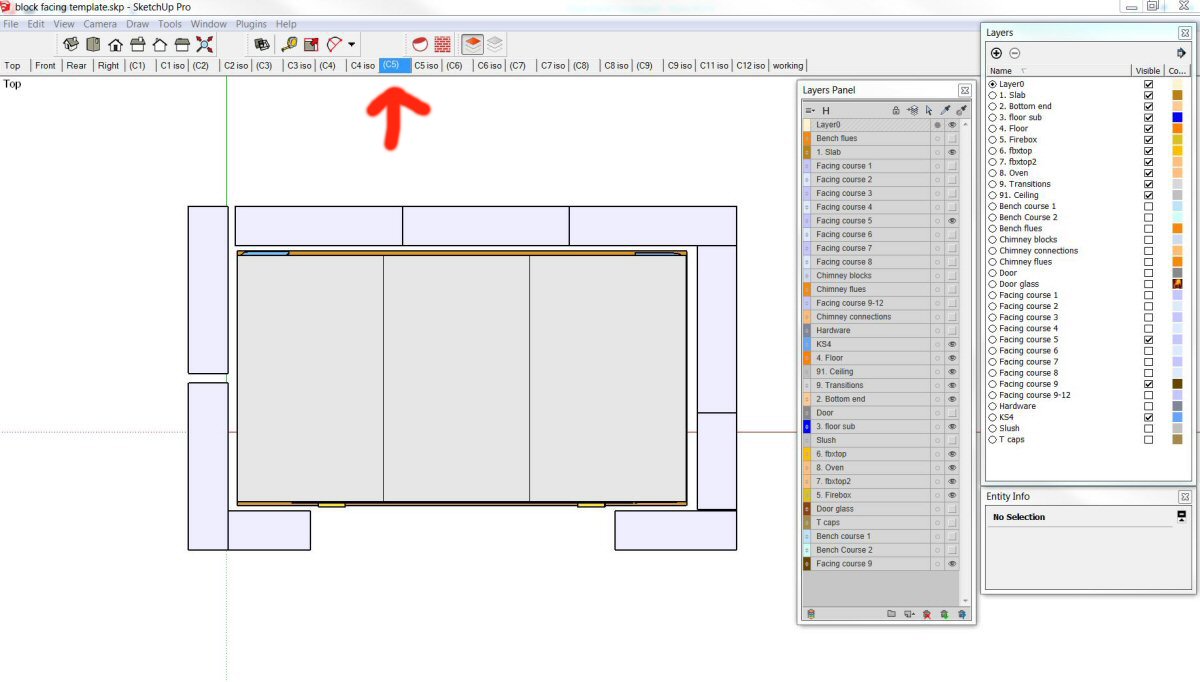
The same model, viewed from the top shows the plan for course 5. It is in a separate scene.
This eliminates having to switch viewpoints in the working window itself.
When any changes are made to the model, all the scenes update automatically.
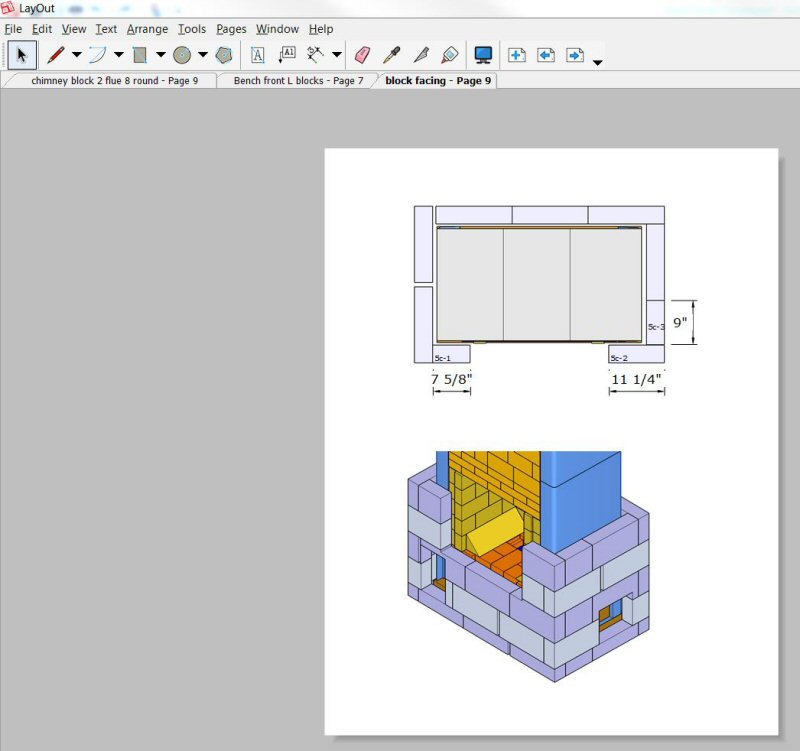
Sketchup Pro includes a separate program called "Layout"
In the example above, each window is a scene from the Sketchup model.
Notice that in the top plan view, you can use Layout to add dimensions and annotations.
This
creates a cut list or a set of 3-D assembly instructions.
The great
leap forward with Layout is that when you make a change in the Sketchup model, the Layout document can be updated automatically,
something that was previously impossible with CAD.
The dimensions you add in Layout are tied to the model and update automatically also.
Quite a time saver when you have, for example, a 30 page heater core assembly manual to update.
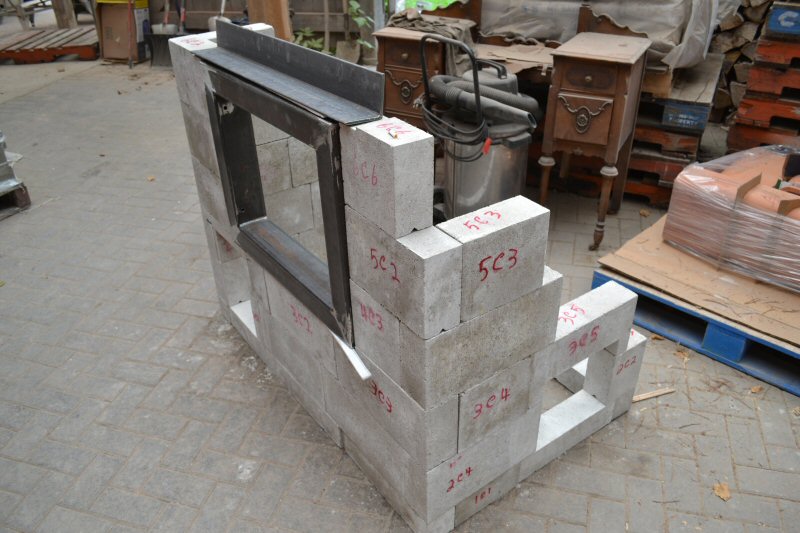
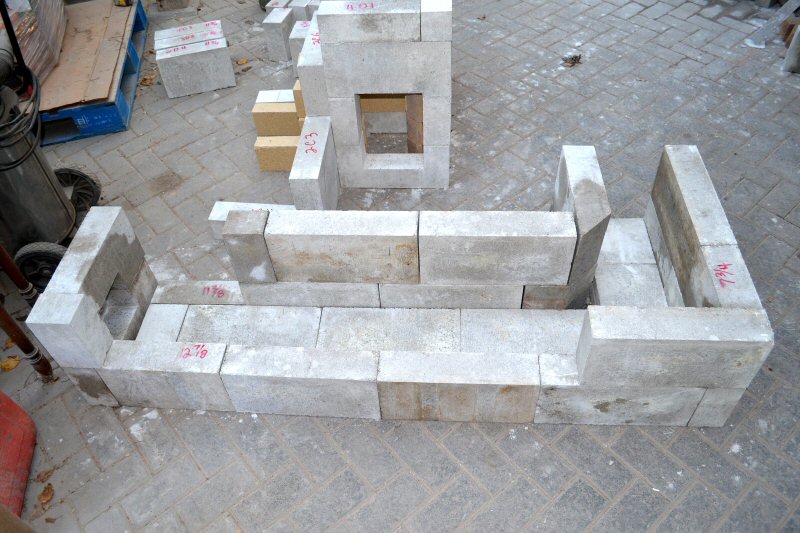
Precutting the blocks at the shop, using the Layout cut list.
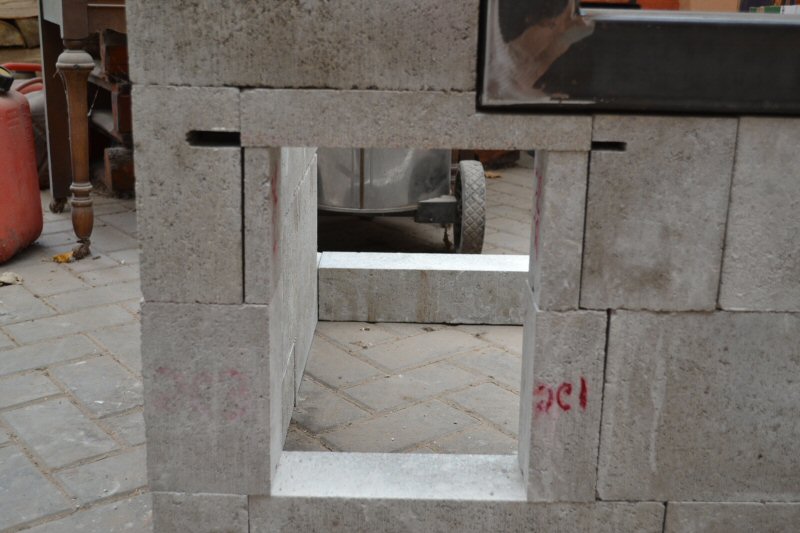
Tricky areas like this bench pass through are easily identified and dealt with at the shop.
Heated bench layout in Sketchup.
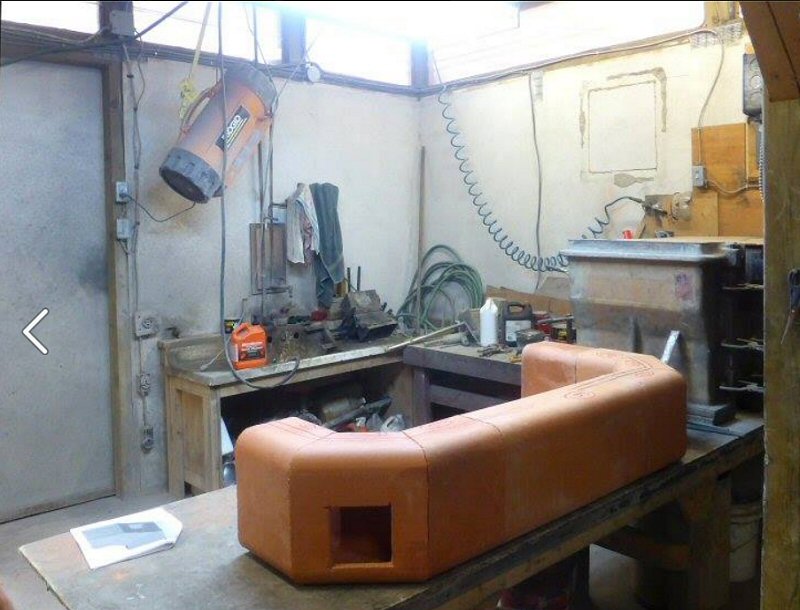
Precut heated bench parts.
Precut heated bench.
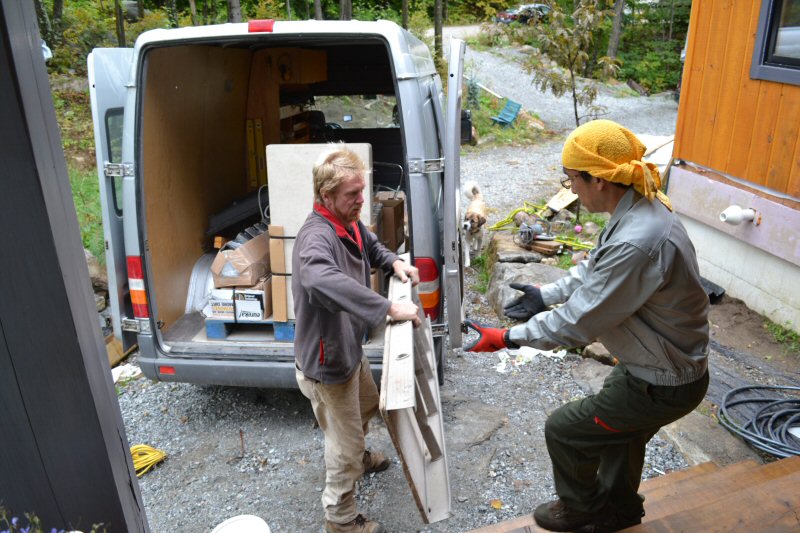
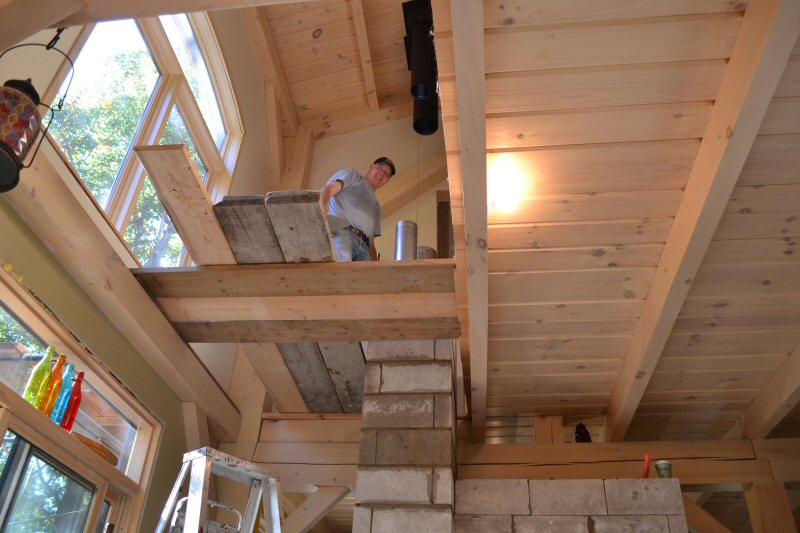
Arriving at the job site.
Eco firebox combustion air detail. It cuts emissions to about 50% of a pellet stove - click the link for details.
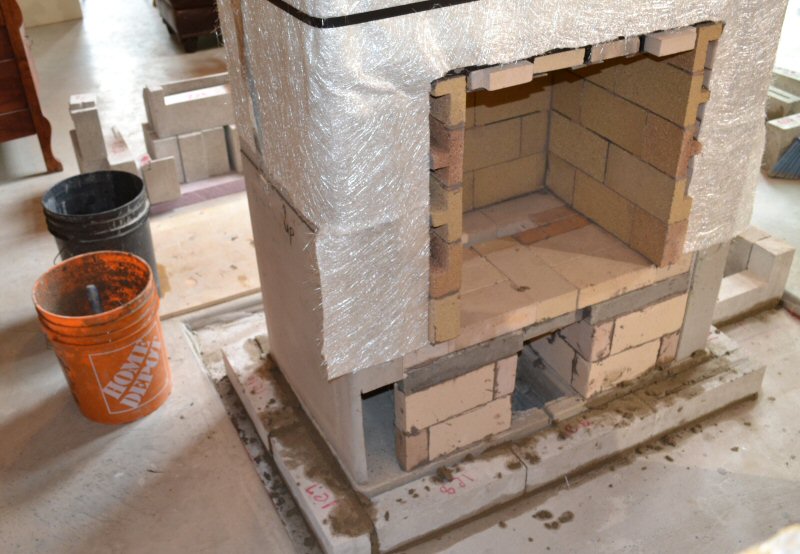
First course of blocks was half height, as it simplified the cuts for the cleanouts and bench and chimney connections.
Aki Yoshimizu came from Japan to lend a hand and to study heater building techniques.
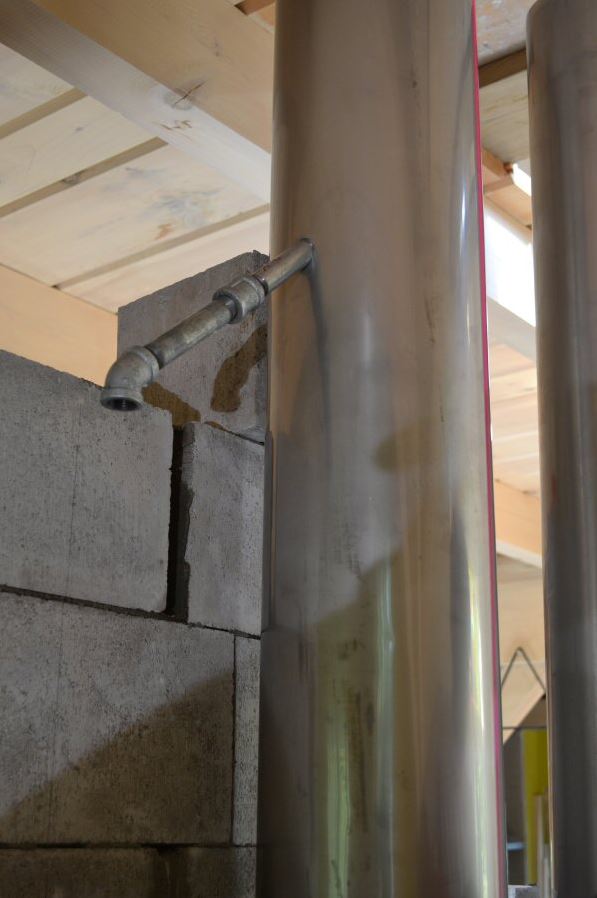
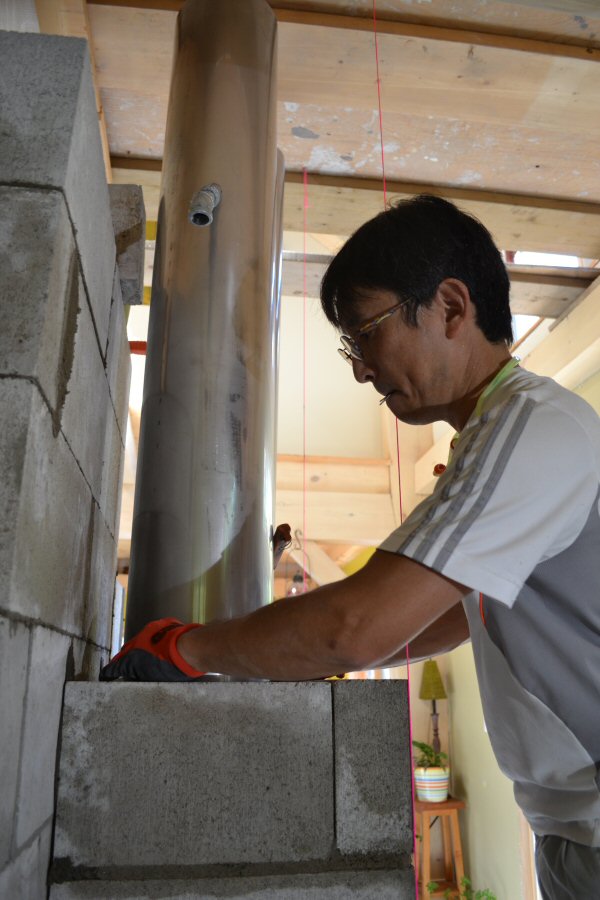
Detail of cable guide for new Excel chimney top damper
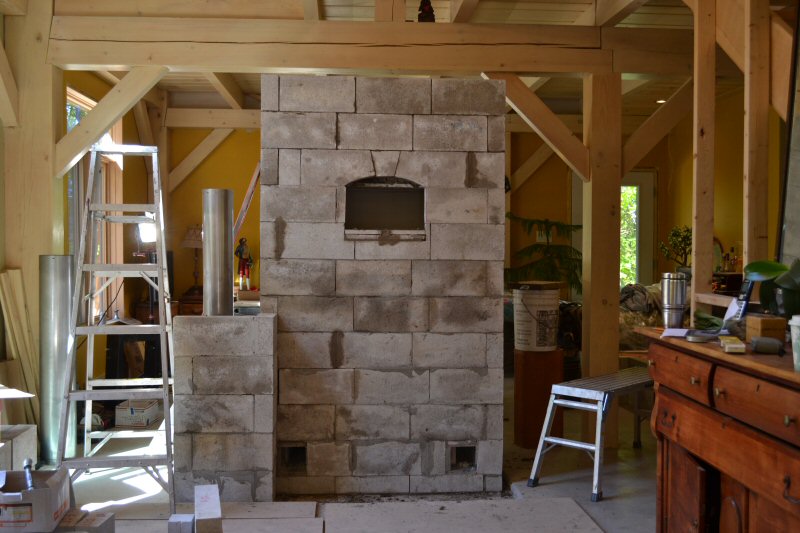
Heater block facing complete. Starting the chimney.
I was not impressed with setting 4" solid blocks in rapid thinset bed joints. It required significant adjustment and shimming
to keep everything flat for the plaster- the blocks would continue to swim around in the thinset for some time.
For the chimney, I decided to switch to regular mortar bed joints. As a professional mason, I found it easier and
faster than thinset. Probably, thinset would be easier for non professionals.
We
retained the thinset head joints due to the precut blocks, and it
turned out to be a big improvement over traditional regular mortar.
Thinset
head joints proved significantly easier to apply.
Most
importantly, you don't disturb the previously laid block, one of the trickier parts of setting 4" blocks.
John McDougall came by on day 4 to help finish the chimney.
John returned on day 6 to help with the plaster.
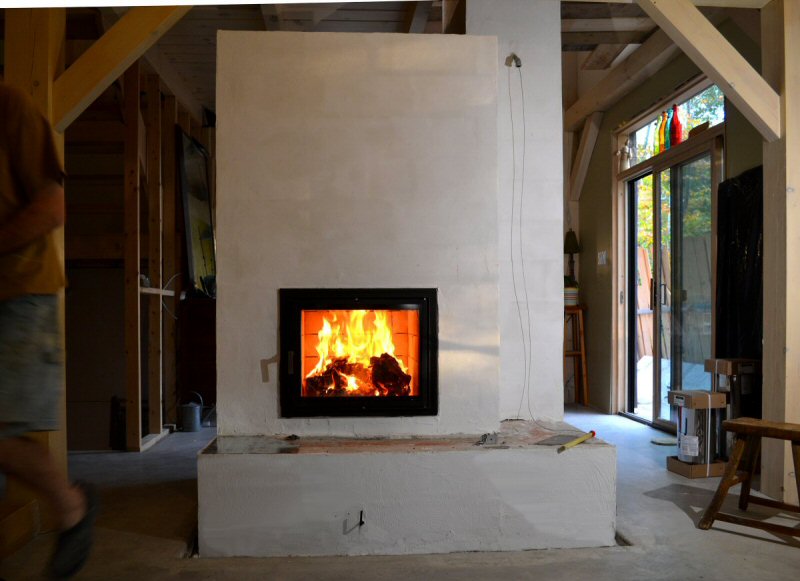
Day 7 - First fire. Waiting on the stone bench top.
The only control required with the Austrian eco-air system is the combustion air on/off lever protruding through the bench
The system is airtight and requires no flue damper. The Excel chimney top damper was included as an experiment.
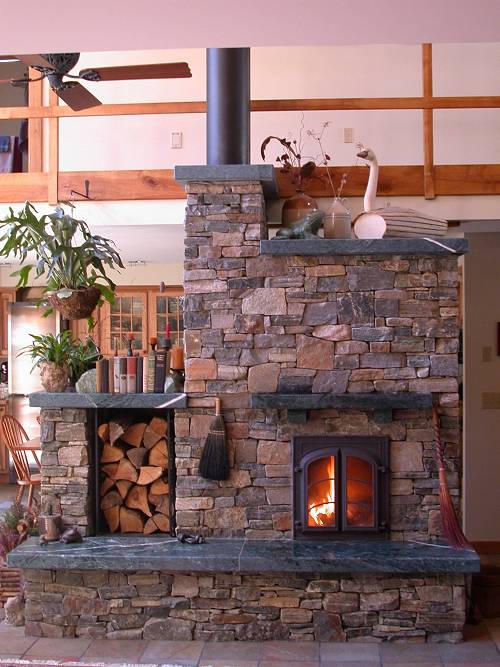
This heater with beautiful dry joint stone work by William Davenport is very popular.
As you might expect, the facing is high end due to the skilled labor required
to dress each piece of granite to fit so accurately, and also maintain a correct stone bonding pattern.
In many places, fine stone work like this is in the $100.00 - $200.00 per square foot range.
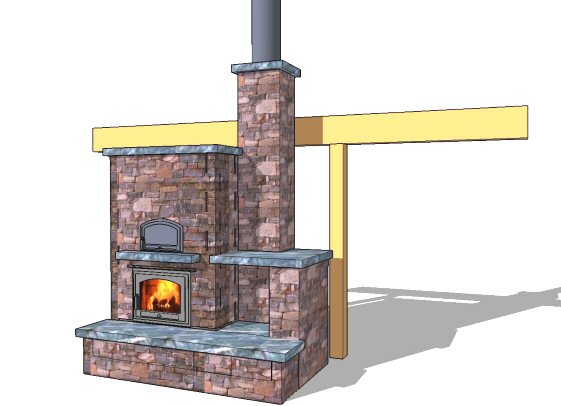
In Sketchup, it was easy to mock up a design for a client, based on the William Davenport heater.
The Windows snipping tool was used to screen grab a sample of the stone work from the photo.
This is used as a texture in Sketchup to paint the face. A separate screengrab was used to get the
texture for the 3" marble slabs.
This model took less than 1 hour to build. The Corinthian Granite used in the original heater is now also available
as a thinstone veneer. This is applied over a 4" concrete block backing similar to the project above, and
greatly reduces the labor required, for drystone in particular.
See Alex Chernov's article on drystone veneers.
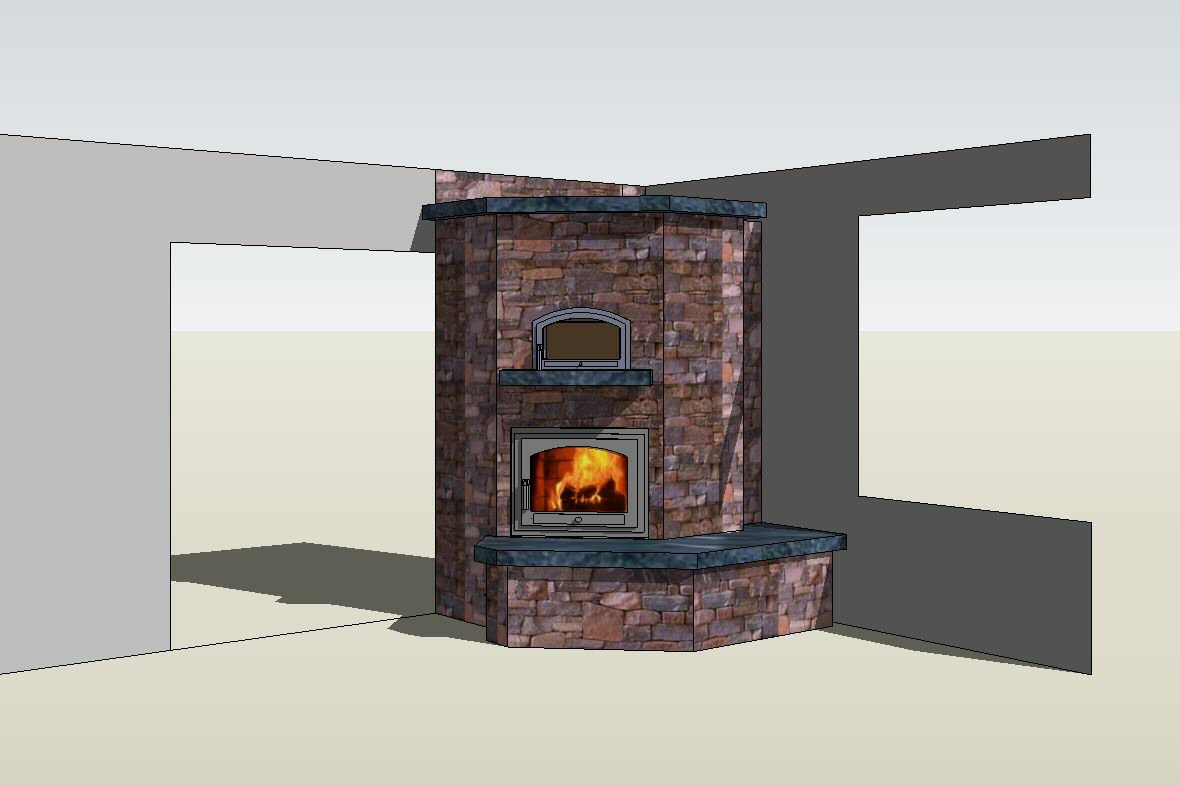
This
is a design for another client, which is a retrofit of a corner heater
with heated bench, into an existing farmhouse near Toronto.
It took about 30 minutes to mock up this simple model, reusing the hardware and textures from the previous model.
This page last updated on December 5, 2014
This page created on September 17, 2014
Back to: