The Clay Ovens of Quebec
I met a man originally from La Bass St Laurent, who could remember his mother baking in a clay oven in the back yard. He wanted to build a similar oven and engaged me to do it in as traditional manner as possible. As a guide I used the superb 1971 field notes ‘Les Four A Pain au Quebec’ a documentation of an oven construction by M. Simard in Bagotville Quebec.

These ovens were a product of necessity, there being no fire brick or clay brick available to build the bake chamber during the early days of colonisation. All materials could be taken from the immediate vicinity, at virtually no cost. Several examples can still be seen each side of The Gulf of St Laurence, particularly in Charlevoix and Bass St Laurent.
Traditionally construction was vernacular. Each artisan building their own version of the same oven. The only real evolution since colonisation has been the addition of a cast iron loading door. The loading openings were originally closed, during baking with a tin or wooden shield.
As an artisan building this oven from materials at hand on location I am the vernacular, and while respecting what has been done before can also deviate at my own professional discretion.
The two deviations will be the concrete foundation slab and the composition of the hearth.
What I have respected though is the equation:
([Height of vault + Height of opening] ÷ Height of vault) x 100
this is the cusp of the project, and will ensure an efficient clean fire. Any variation will cause the oven to work less well.
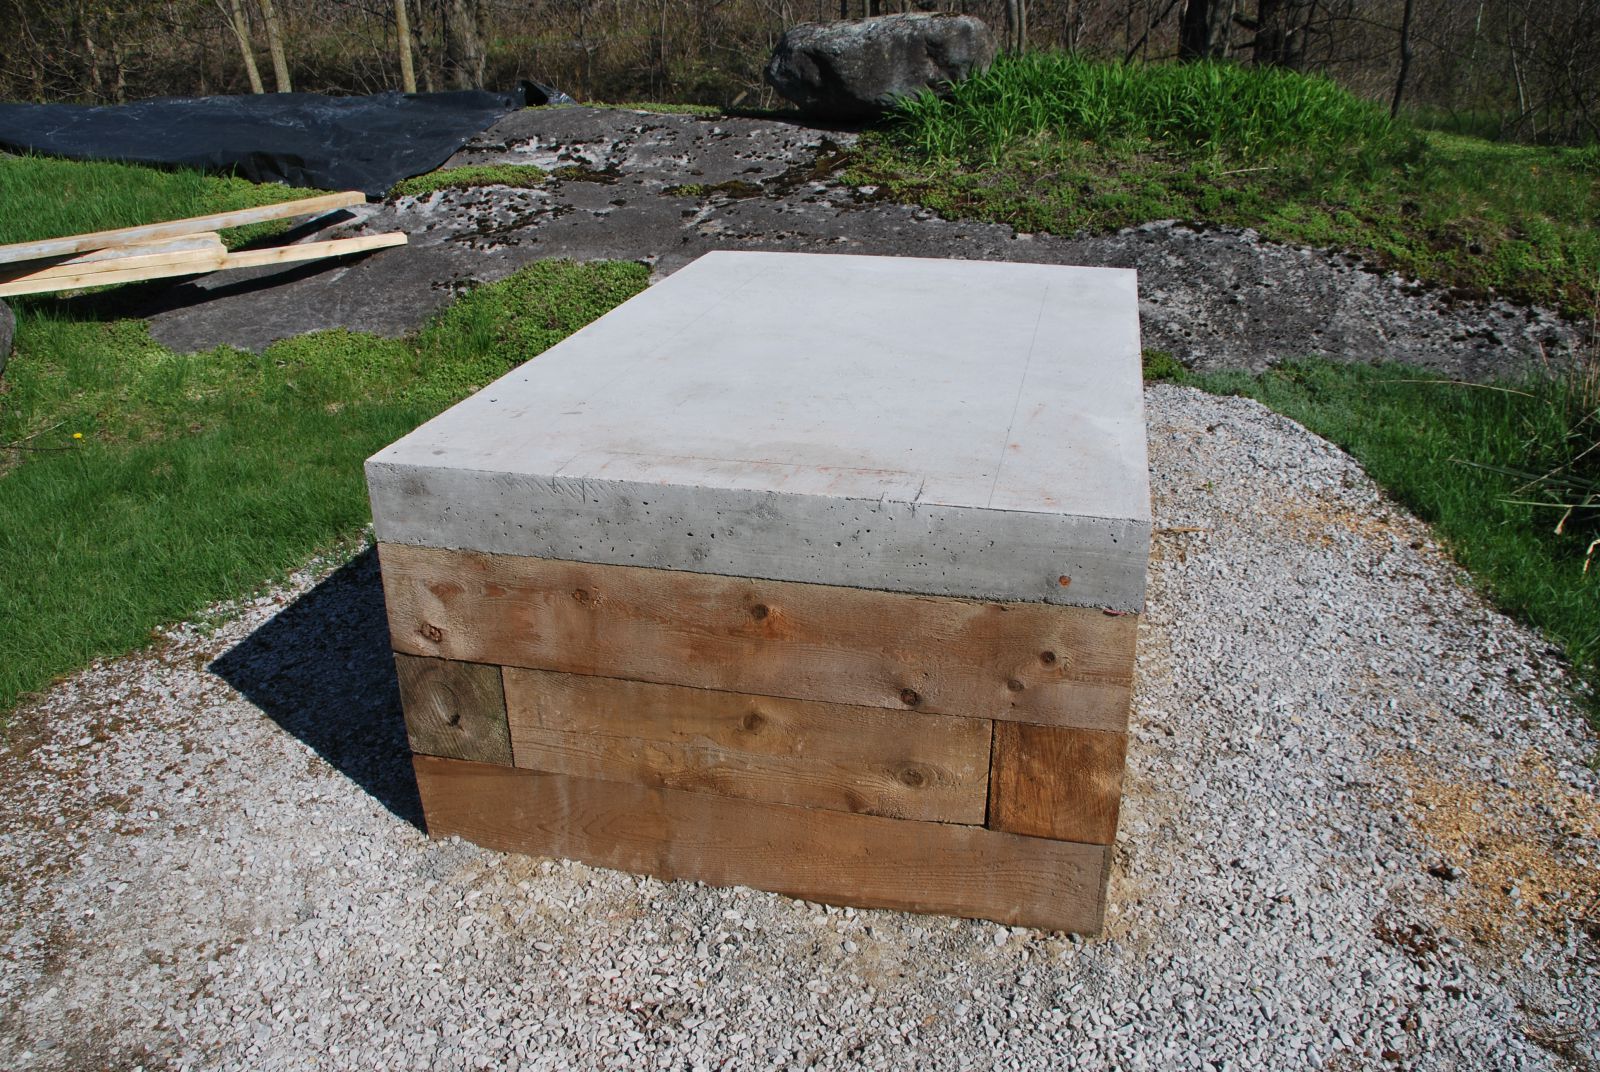
The foundation is formed from 3 rows of 8 x 8 inch cedar laid onto compacted gravel. An armed concrete slab will support the hearth and bake chamber. This slab is quite thick and has two rows of bar, which would allow it to be lifted off the foundation should the cedar have to be changed in the future. Traditionally the foundation would be filled with sand and then stone, or bridged with wood before a hearth was made of clay.
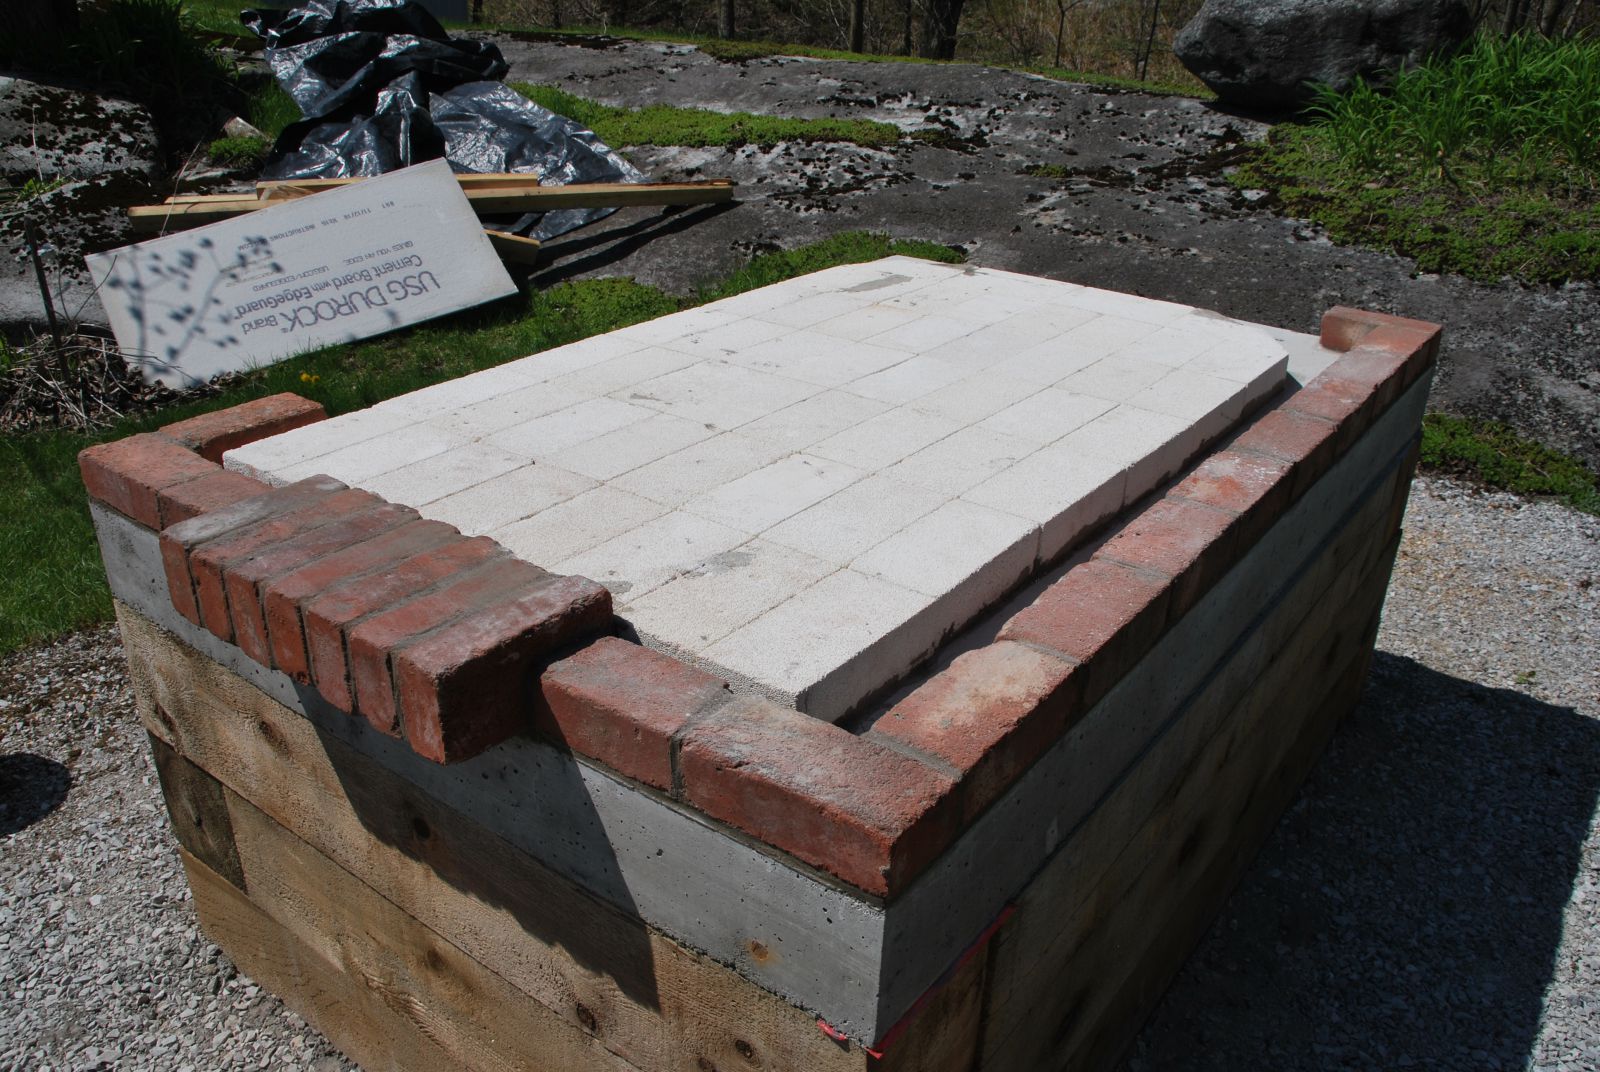
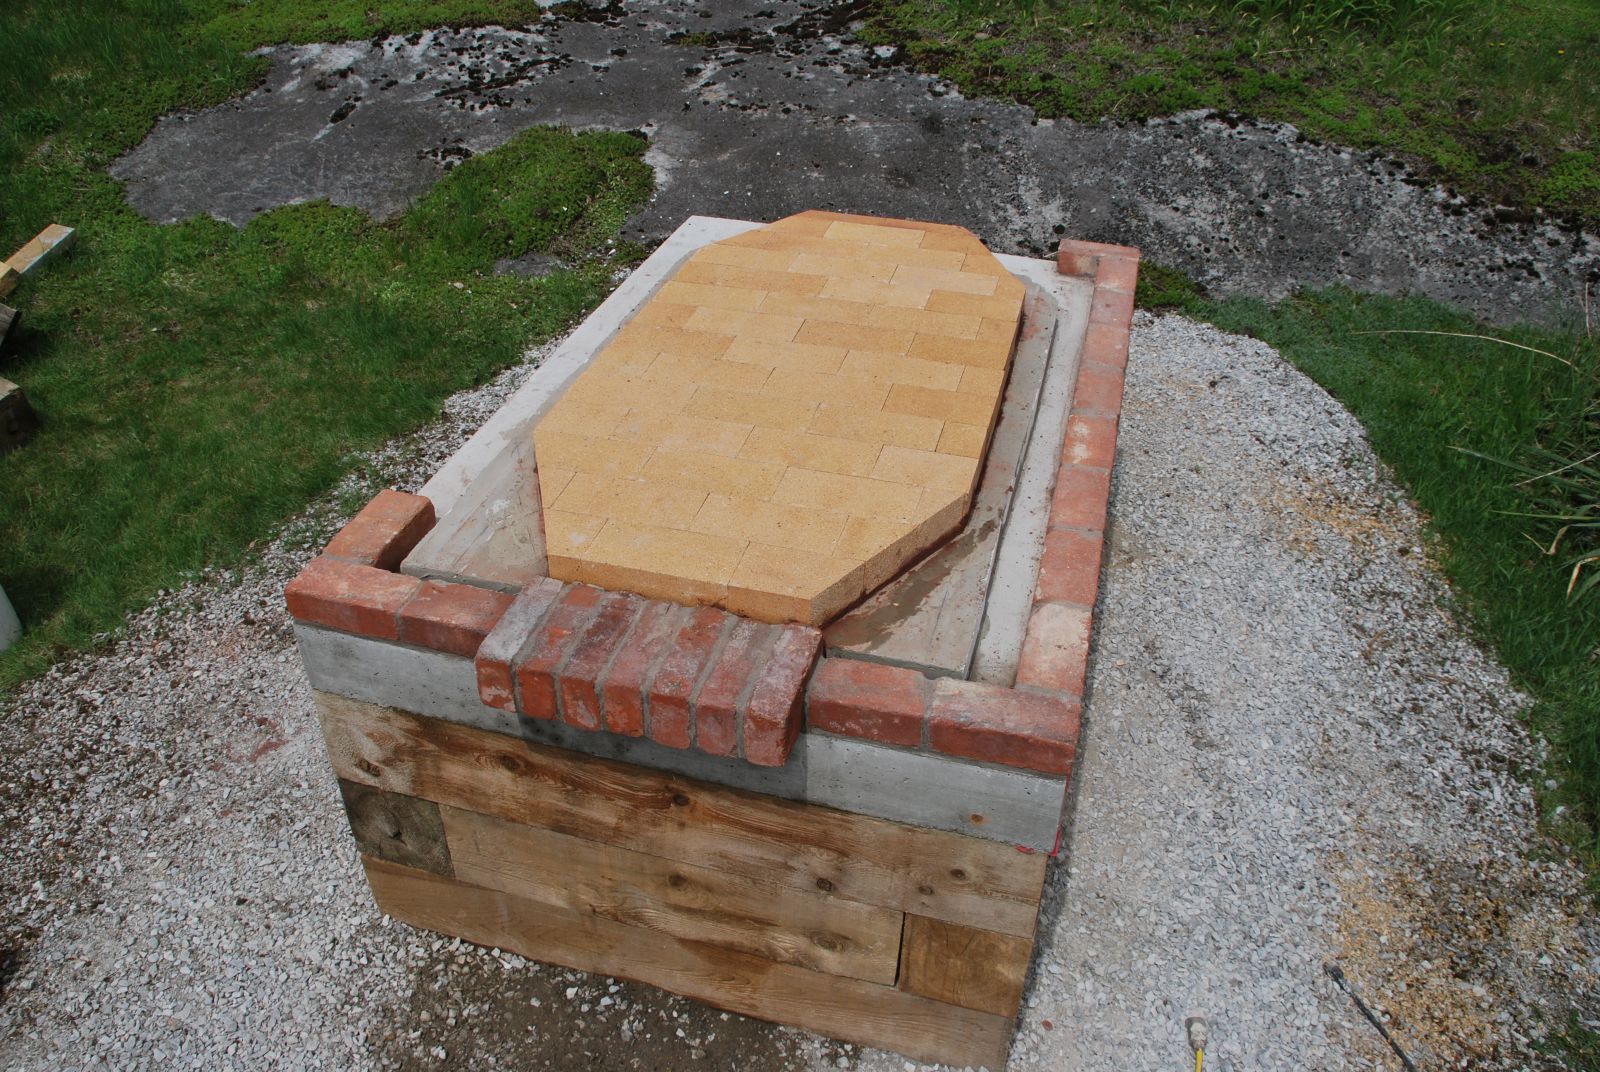
The clay brick represent the outer limit of the clay facing. A course of insulated fire brick are laid slightly larger than the hearth.
The upper surface of the hearth is in high duty fire brick laid onto the course of insulating fire brick in clay mortar. The hearth is cut to the exact inside dimensions of the bake chamber. This is difficult, and it is way easier to lay the hearth over the whole of the area the bake chamber will sit upon. The problem is though, that if the hearth were to extend beneath the walls of the bake chamber, the weight would cause the hearth to sink slightly around the periphery, and so rise and become uneven on the inside. Also if the hearth is laid as shown, any brick can easily be replaced, should that become necessary in the future?
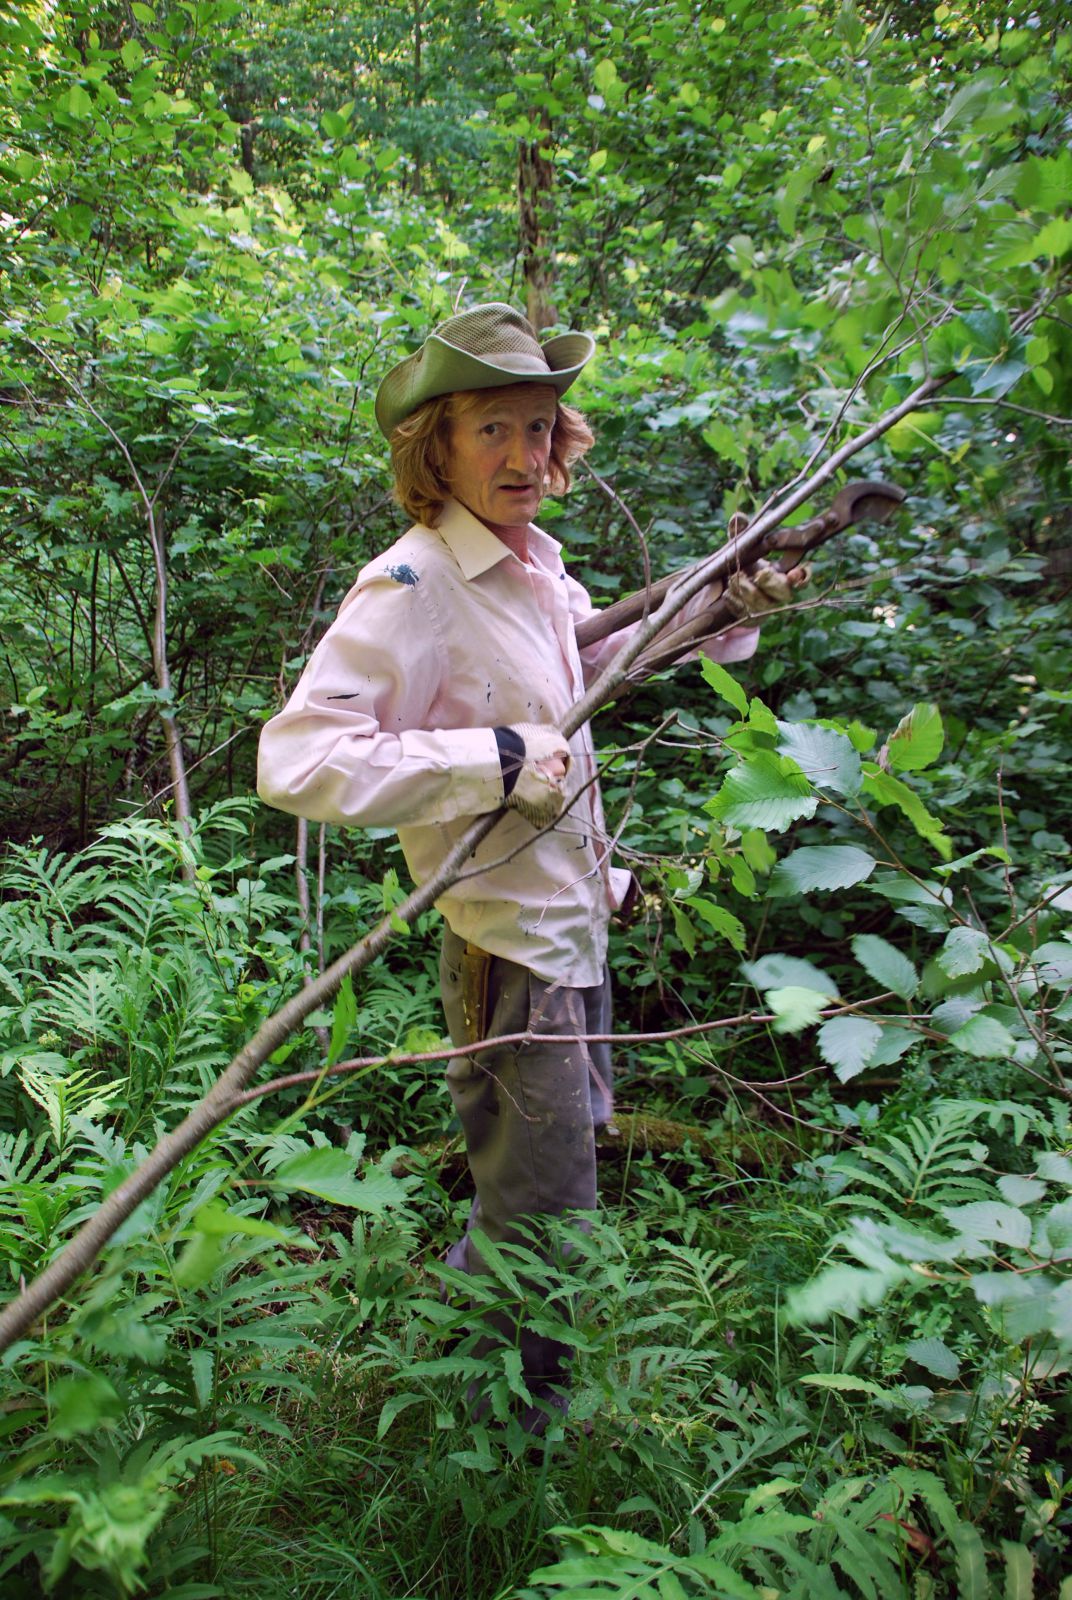
In early spring I had gone into the bush to locate an area where I would be able to come back in summer and cut the branches needed to make the wooden form.
Traditionally any of the 3 native varieties of alder were used. This is alnus glutionosa.
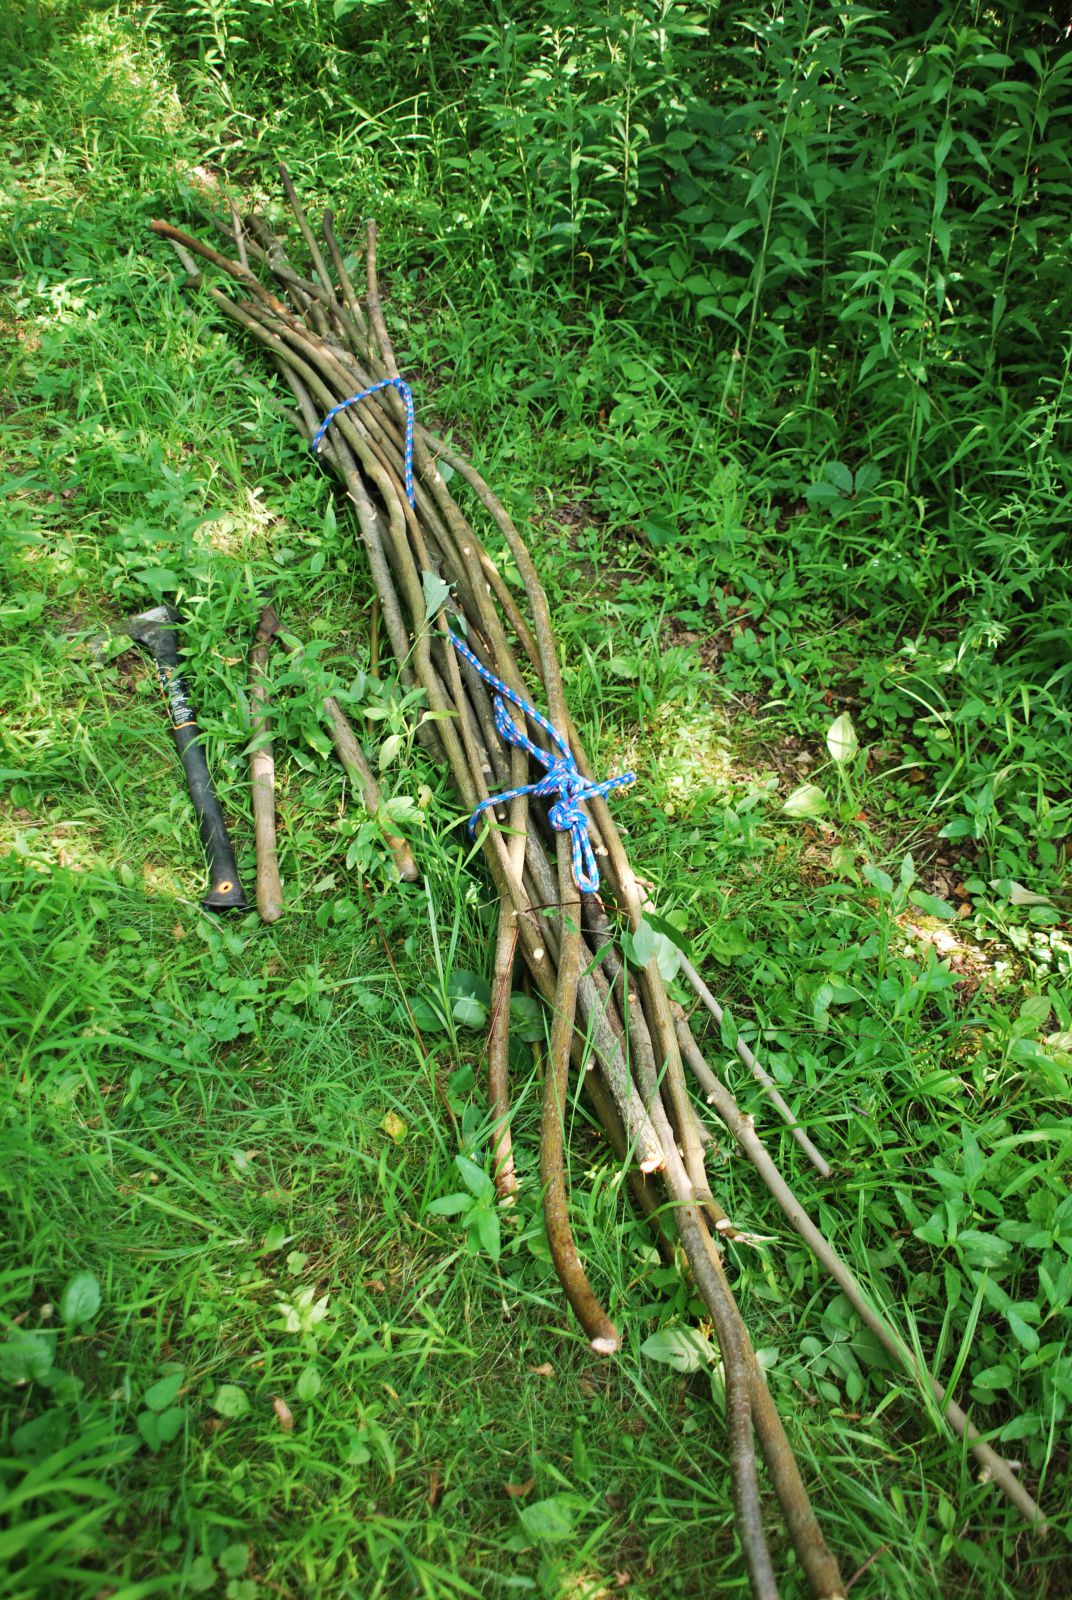
The branches ready to be carried from the woods. Both alder and some eastern dogwood have been cut.
We waited until the clay was on site before cutting the branches to assure that the branches did not dry and lose their flexibility. The clay was taken from the bed of an ancient stream on the client’s property.
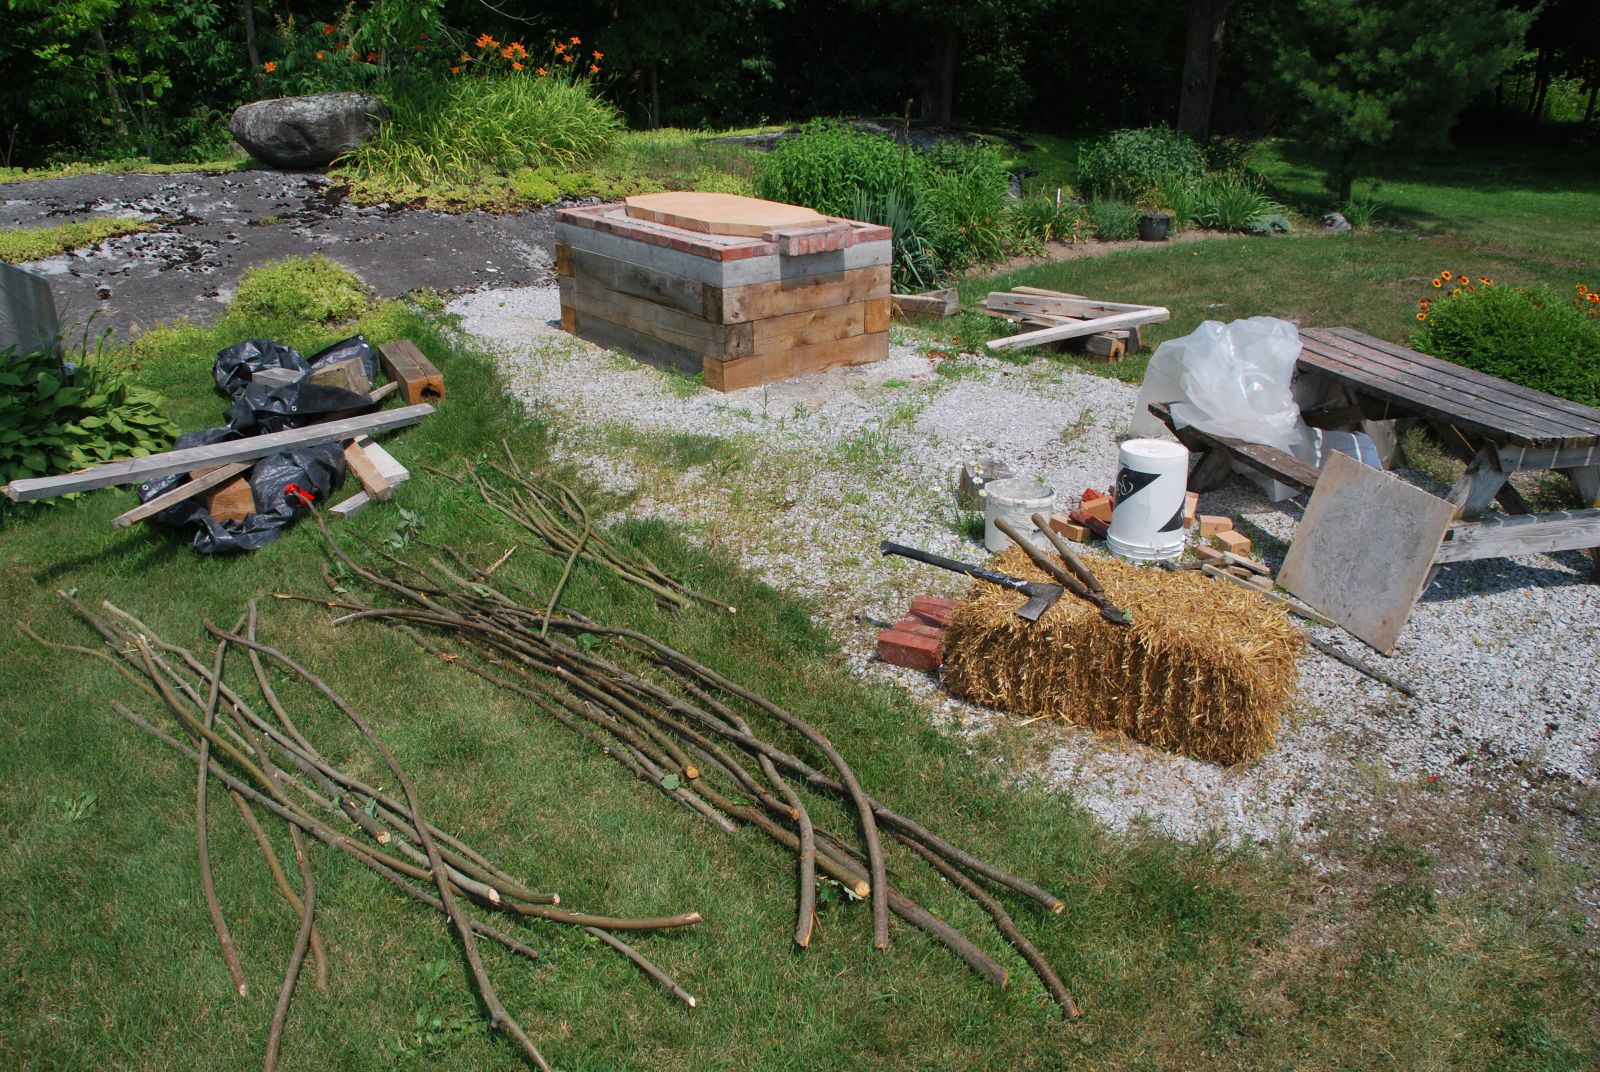
Ready to start making the form.
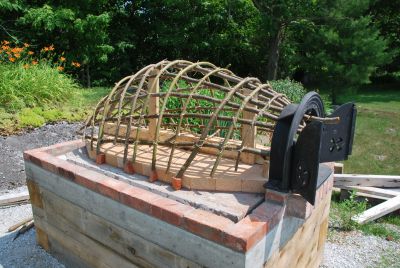
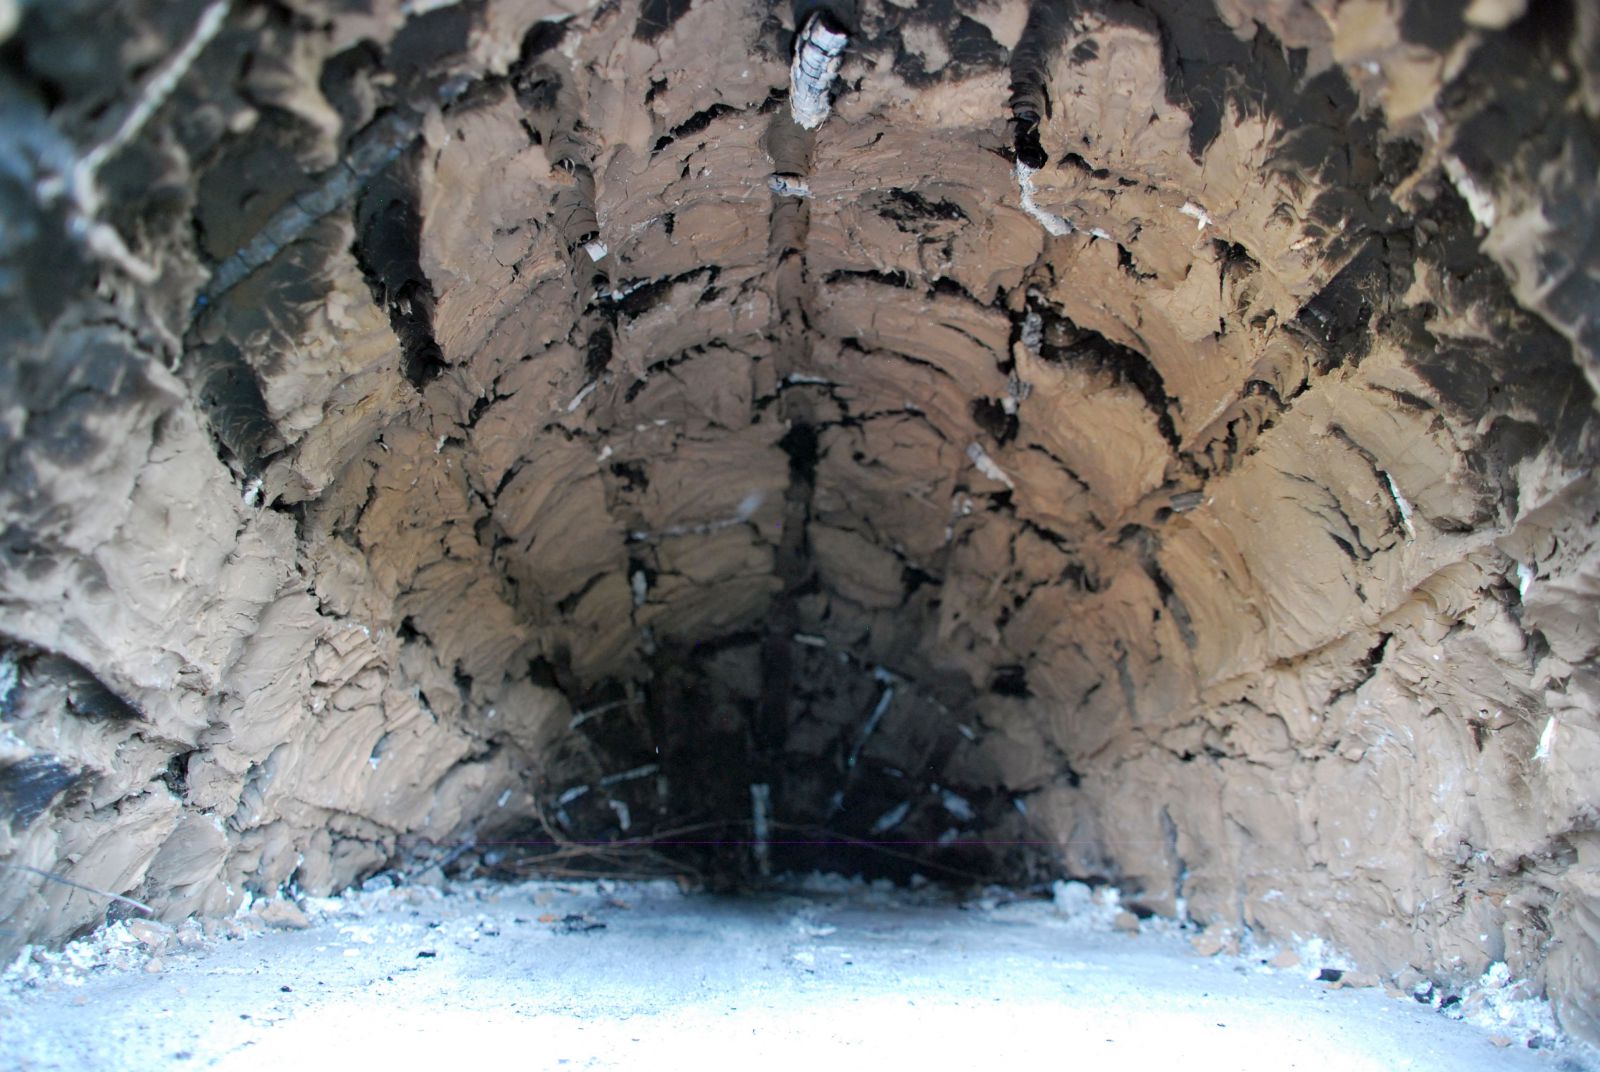
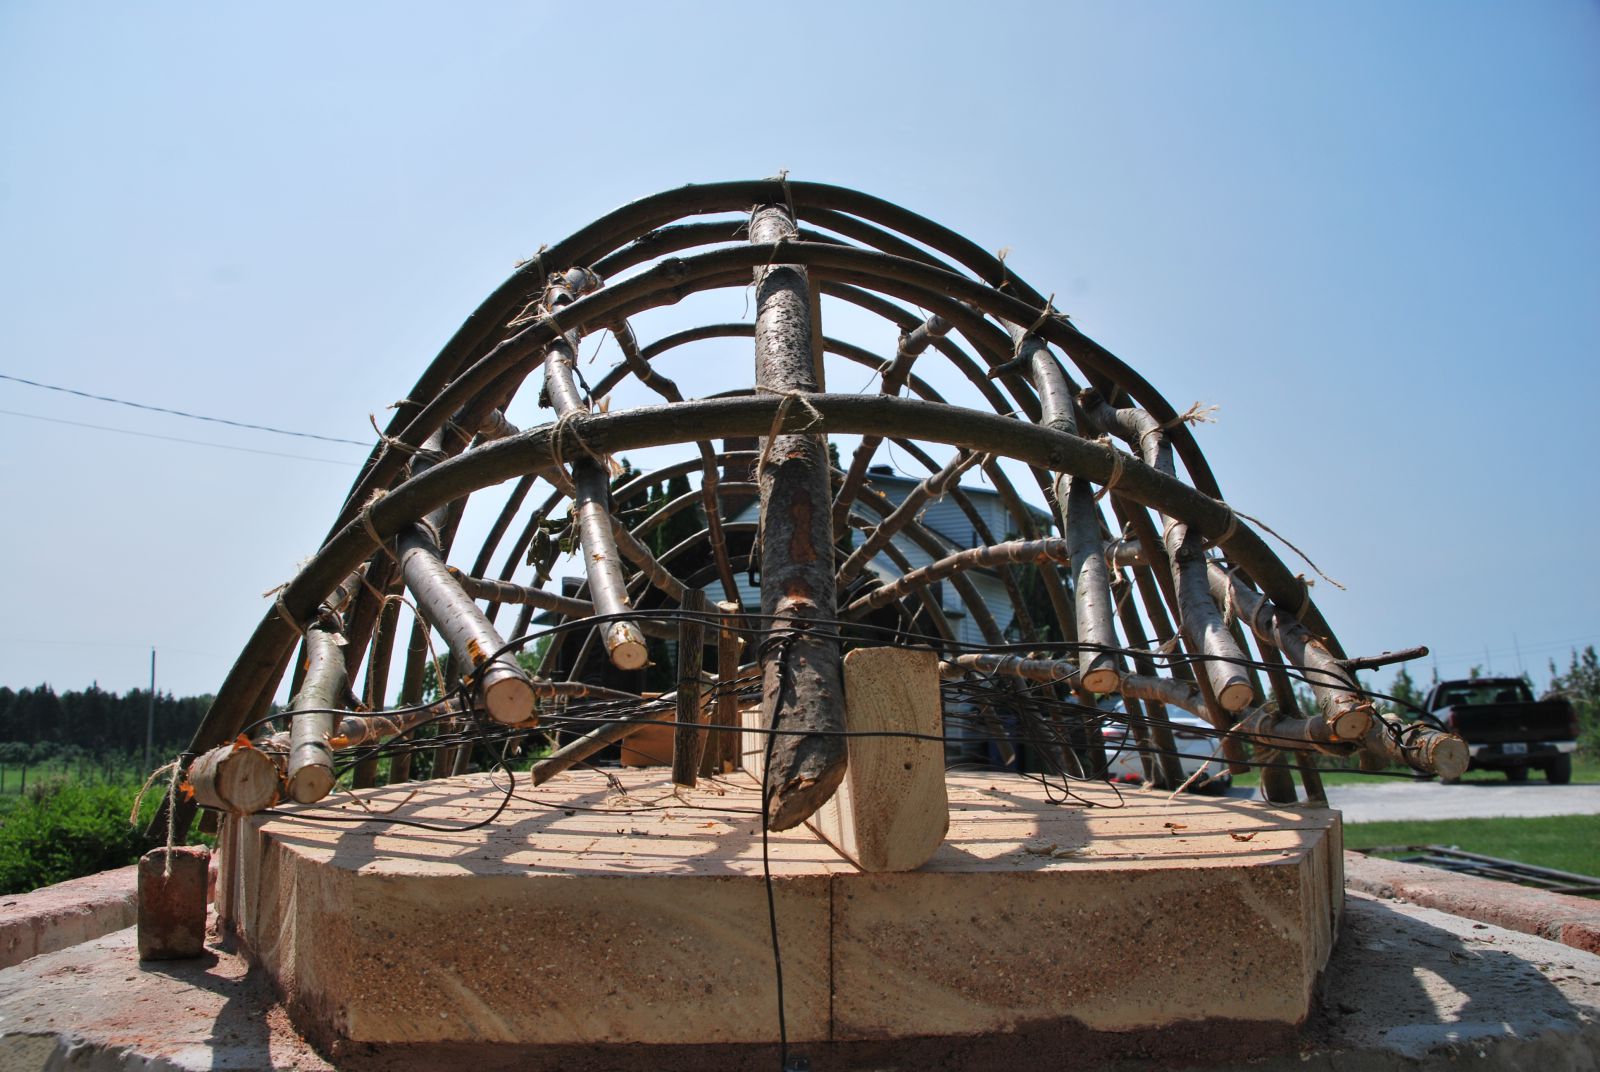
The cast iron door is screwed to the sailor course of common brick, directly below the loading opening, before the form is built. Note that the ends of the branches do not protrude down to the course of insulation, but rest upon pieces of brick. This is to assure that all the wood of the form burns out, and that the branch ends do not stay and smoulder each time the oven is lit. The two vertical pieces of sawn cedar attached to the piece running length way along the middle of the hearth, are guides to assure that the height of the vault is at optimum proportion in relation to the height of the loading opening; and that the form does not descend during application of the clay. Alder were used for the branches that run length ways and dogwood for the cross branches.
Note: The form can be made from strips of 2x 6 spruce ripped at a quarter inch and then covered with hessian or jute cloth. This would give a smooth finish to the inside of the bake chamber, but be yet another variation from tradition.
Building the form like this means that each cross branch has to be held bent in place, with wire attached to the opposing end of the branch on the other side of the hearth. The wires are then tightened or loosened with twist sticks that can be seen to the left of the end of the thick branch in the middle of the image.
The frame is not easy to make but once held in position and all the branches tied into place, it is surprisingly rigid.
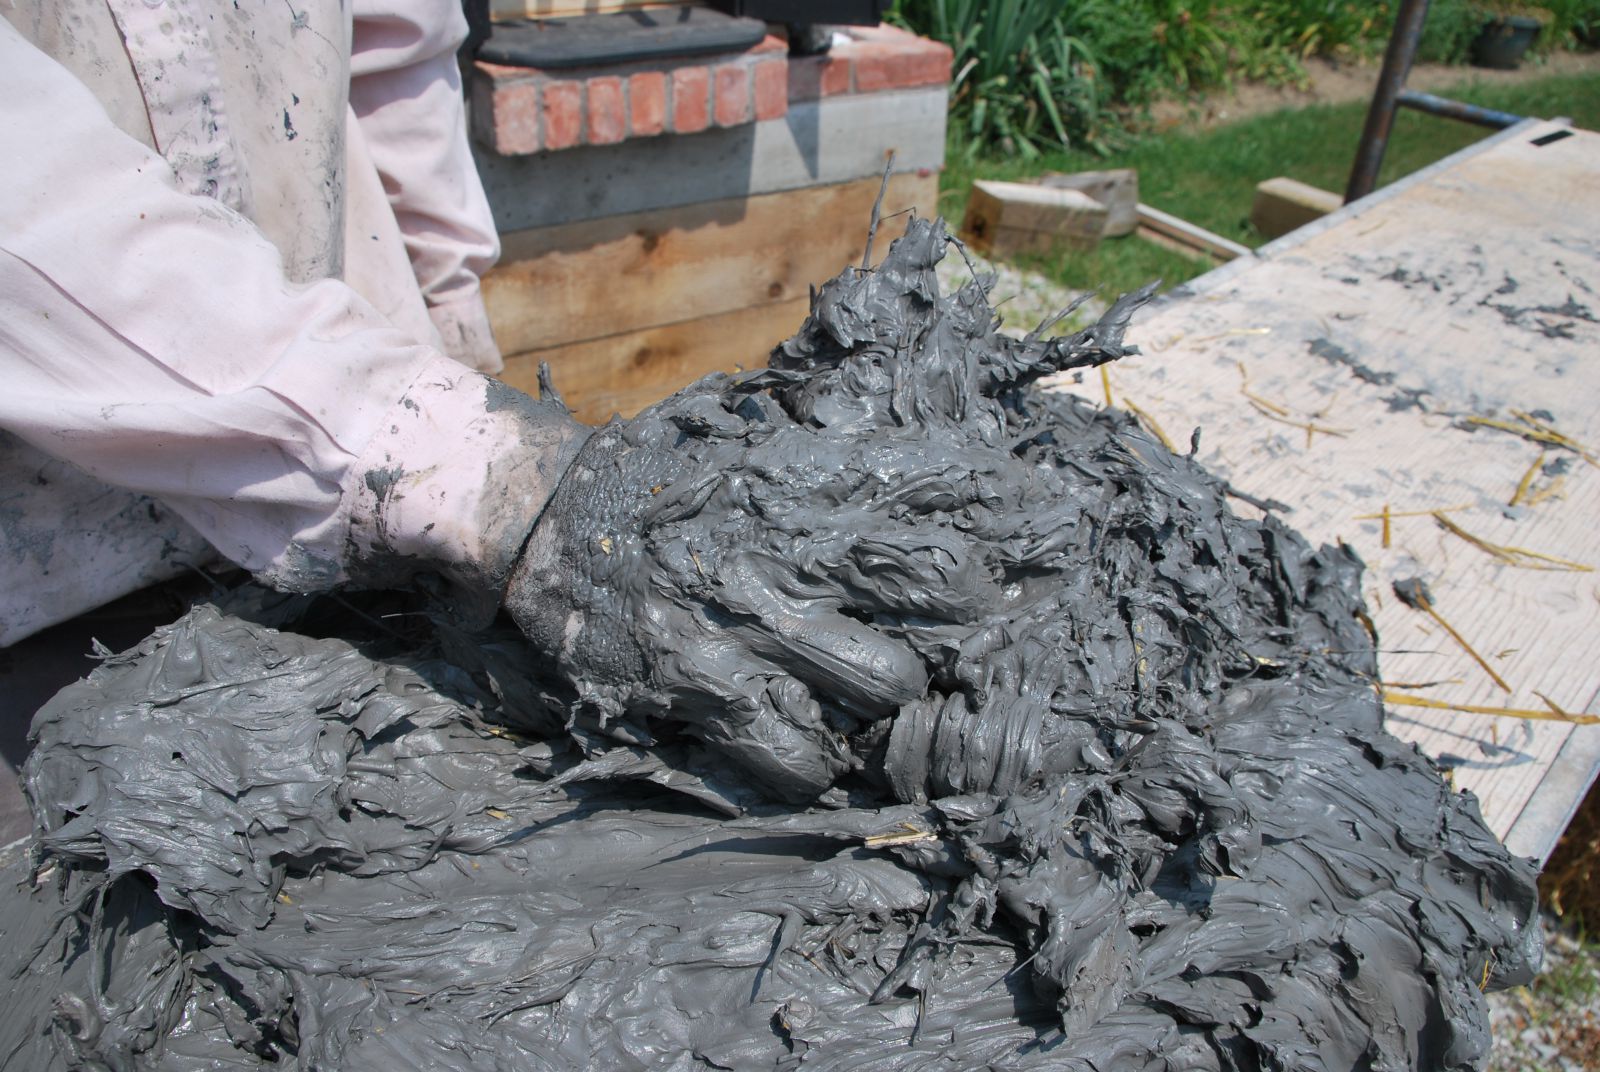
I had never worked with or even thought about live clay before so getting to grips with it was quite something.
The clay is mixed with straw which will give key.
Note: The clay used is quite pure and so I should maybe have added sand to reduce shrinkage, which would be at about 12 % I imagine that in the time when these ovens were common they would be built with a wide range of clays and contaminants.
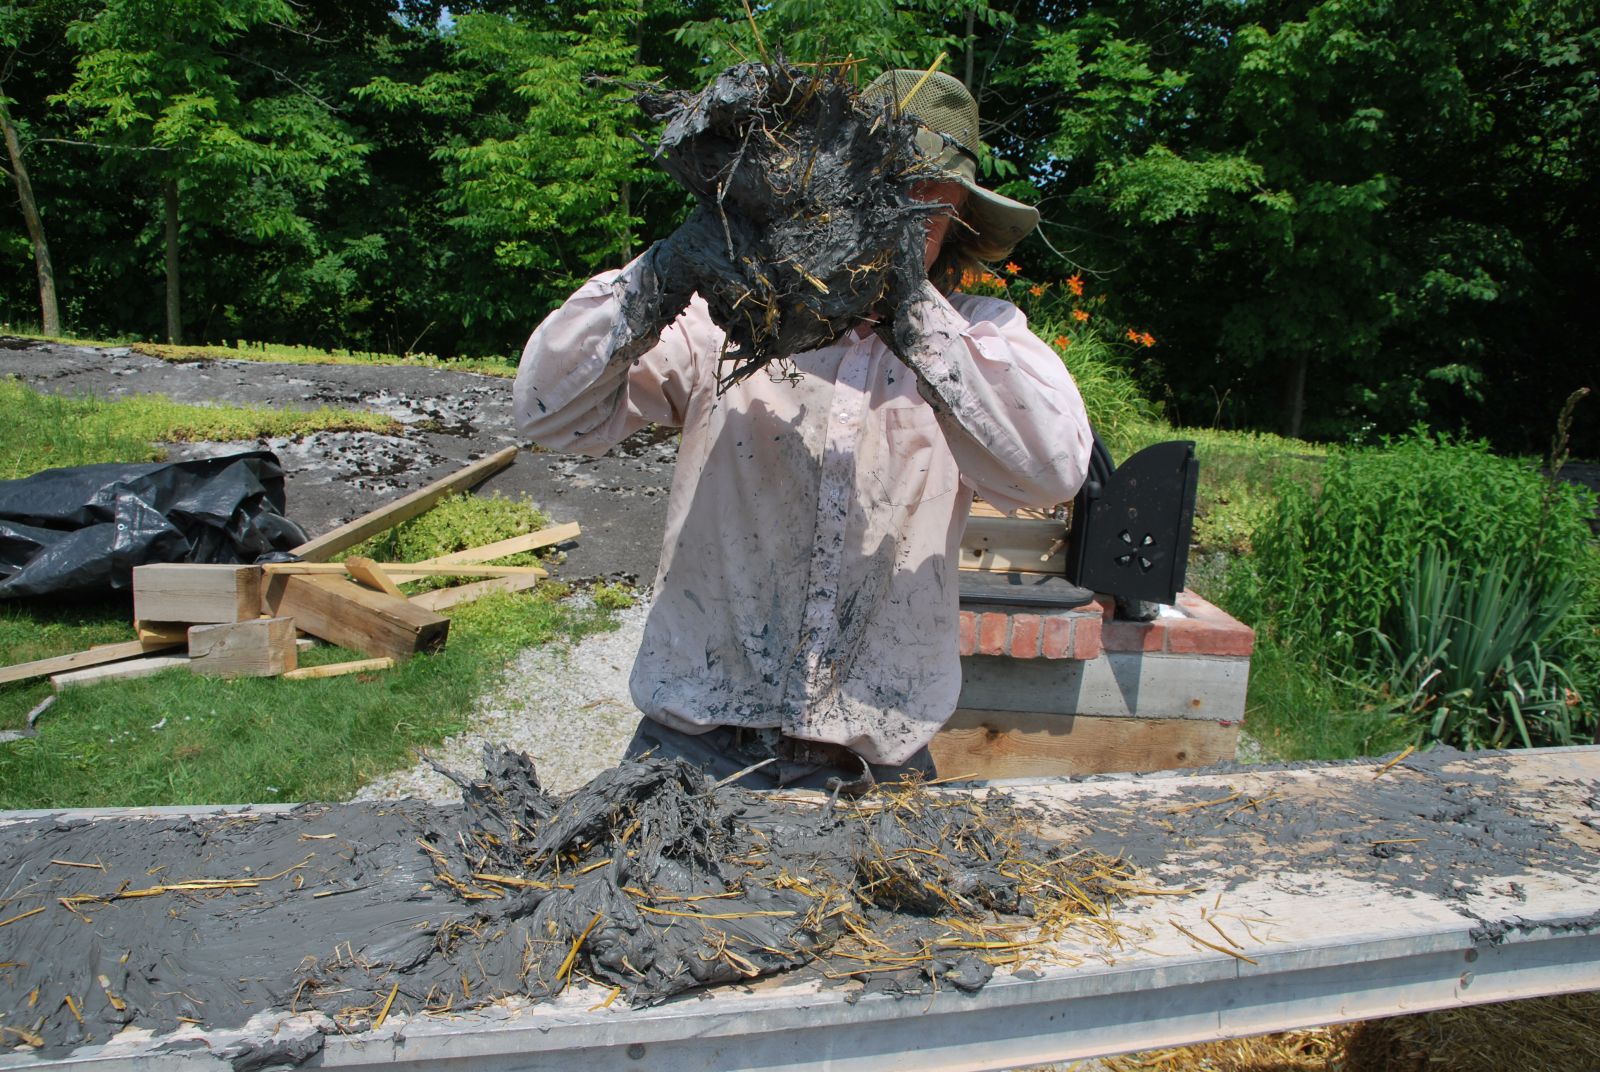
Immediately after the application of the clay straw mix.
The oven was allowed to dry for 2 weeks one of which in full sun without canopy. As it dried cracks appeared on the outer surface.
The larger of the contraction cracks were filled using a three sixteenths slick and the rest by repeatedly throwing a liquid sand clay mix hard onto the surface. This image is of the initial cracks just before being filled. As the oven dried the cracks opened even wider than this, and were refilled on two more occasions. This is the 12 % contraction that the addition of sand would reduce but not stop.
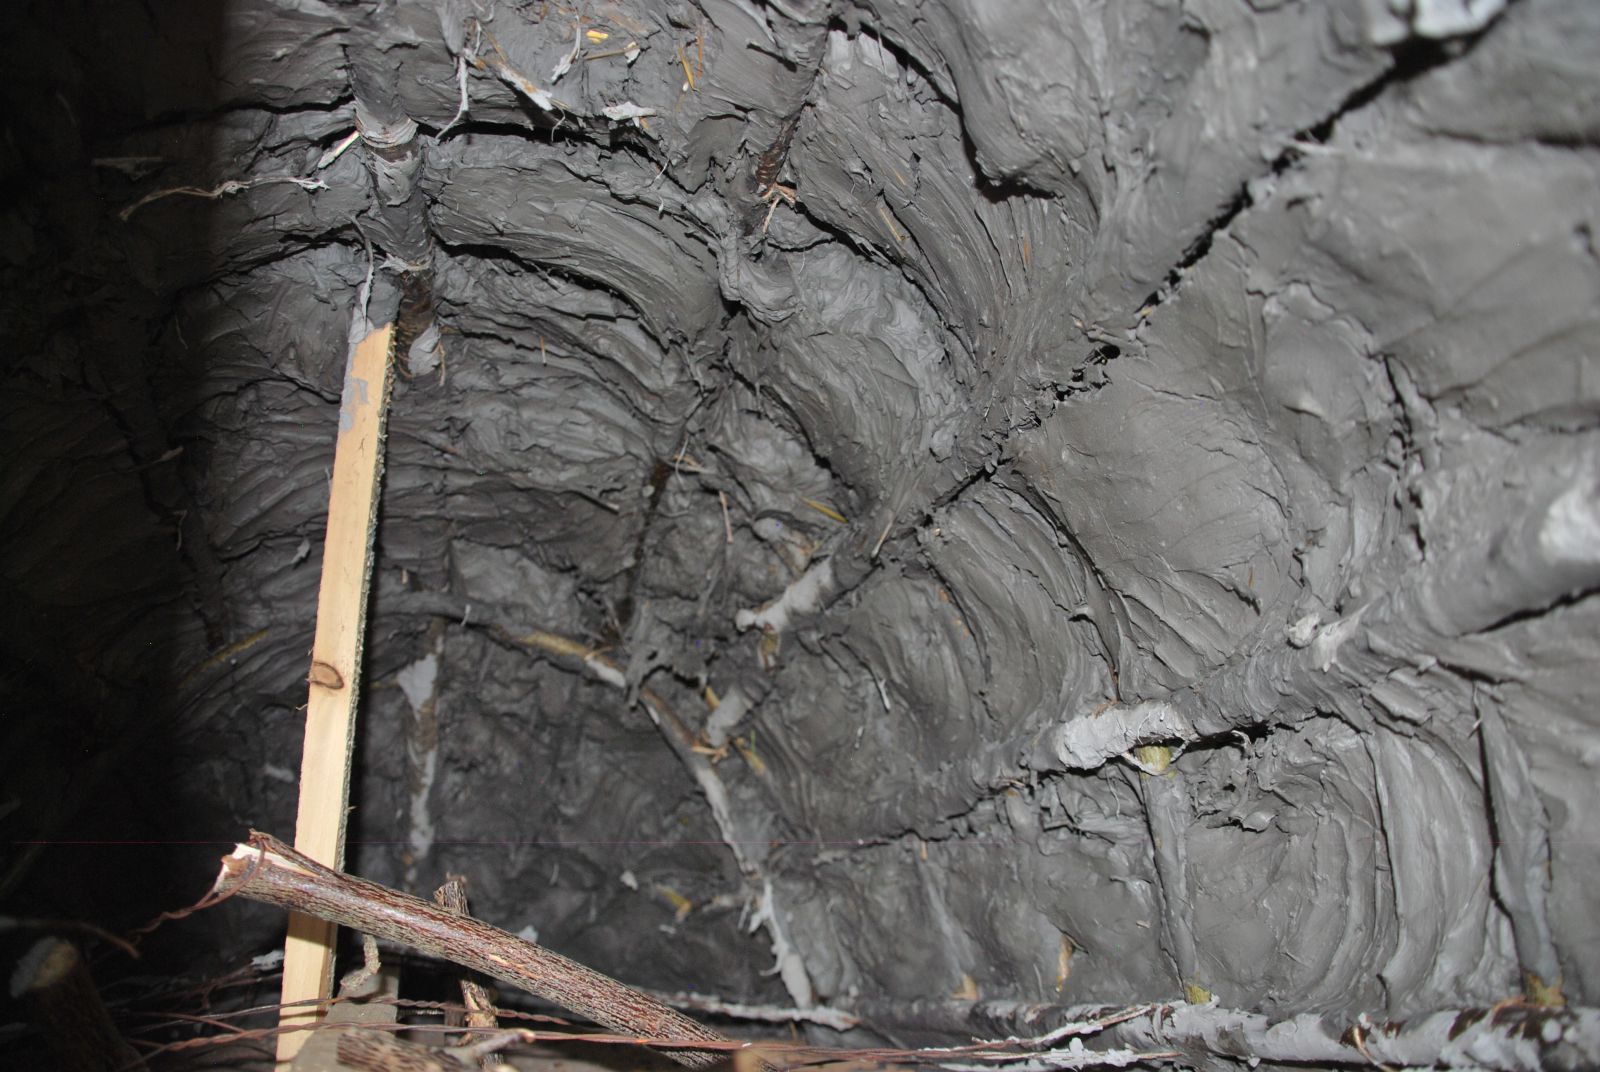
View inside the bake chamber as it is drying. The cracks were limited to the outer portions of the dome. As the clay dries it becomes increasingly difficult to make any sort of indentation with a finger. If still malleable then it is better to wait until it is solid before having the first curing fires.
A series of small curing fires is lit in order to burn away the wooden frame and expel any remaining mechanical water.
View inside the bake chamber with the branch work almost entirely burnt away. The clay that has fused on the surface has turned salmon colour due to the inclusion of carbon. The clay on the outside of the wall will never fuse and only air dries. What I observed while making a slight repair is that in a 6 inch thick wall, 2 inches on the inside have fused, with approximately 4 inches on the outside air dried, after a slight interface. Though these ovens are primitive in a sense that they were a product of necessity, they do perform extraordinarily well. This could be by coincidence, though I suspect not. The fused clay on the inside offers excellent transfer, and captivation within its self, and the inertia of the ‘green’ clay behind. Green clay as opposed to fused clay has 70% less transfer efficiency and so in a sense acts as insulation. The oven gets hot fast and stays hot for quite long. At least this was my impression when firing it.
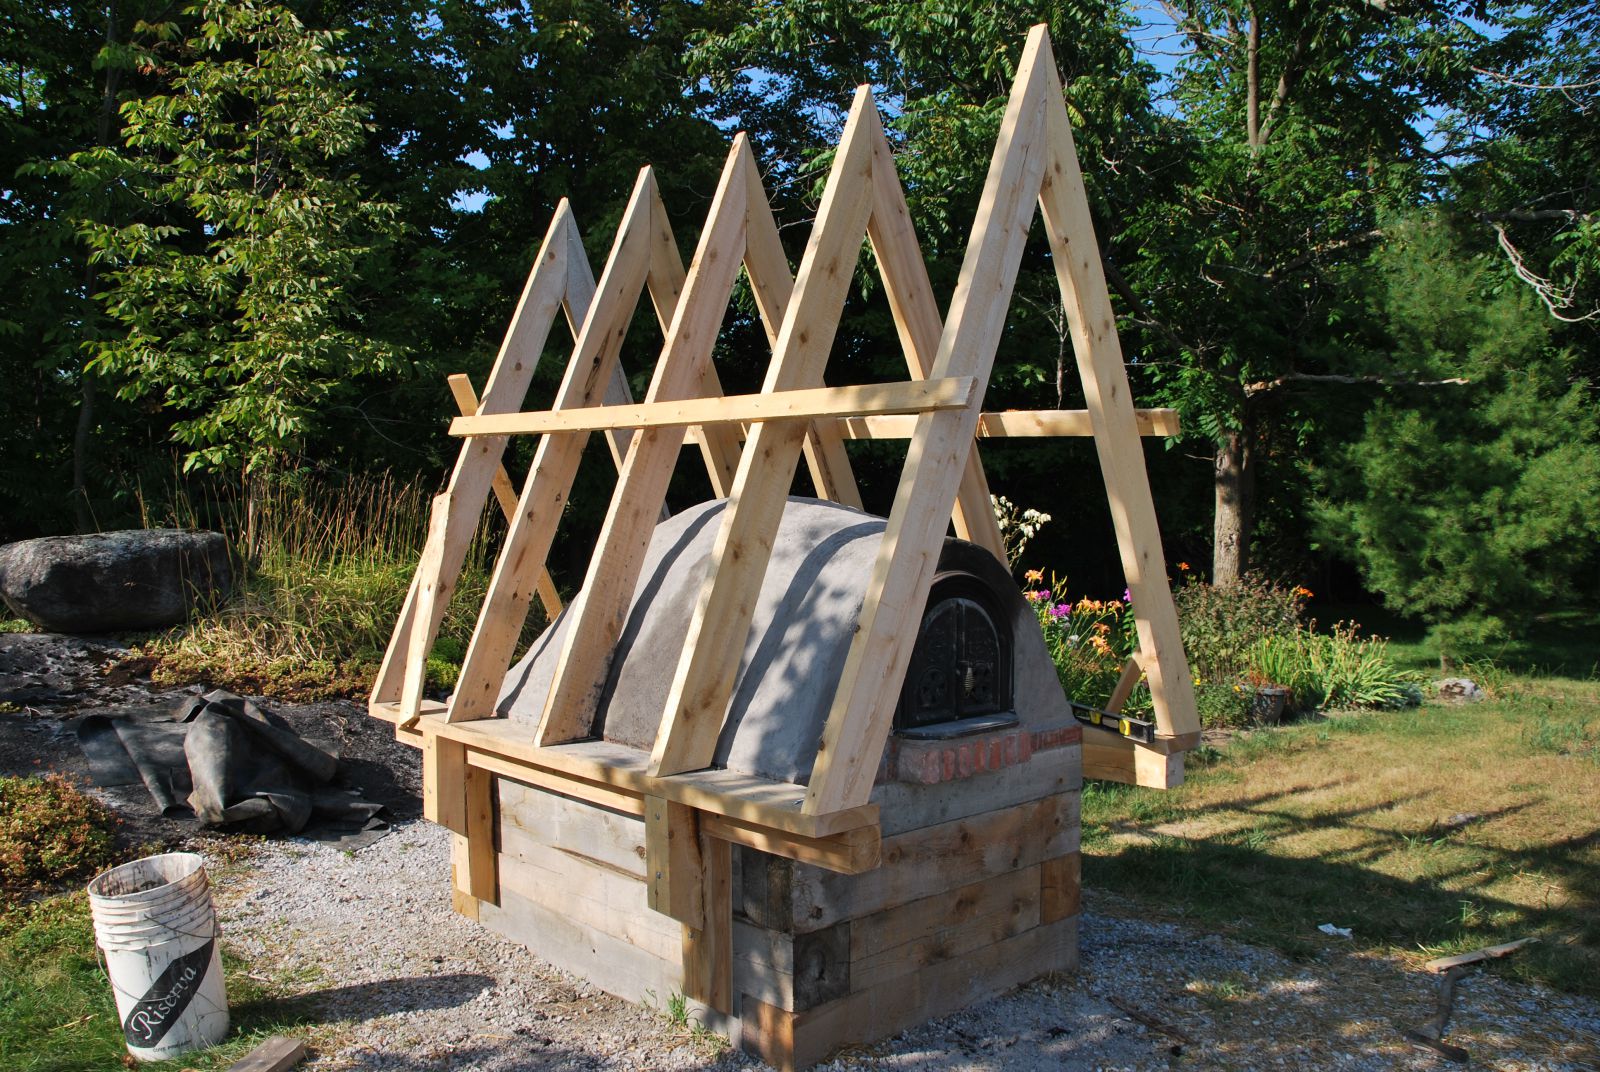
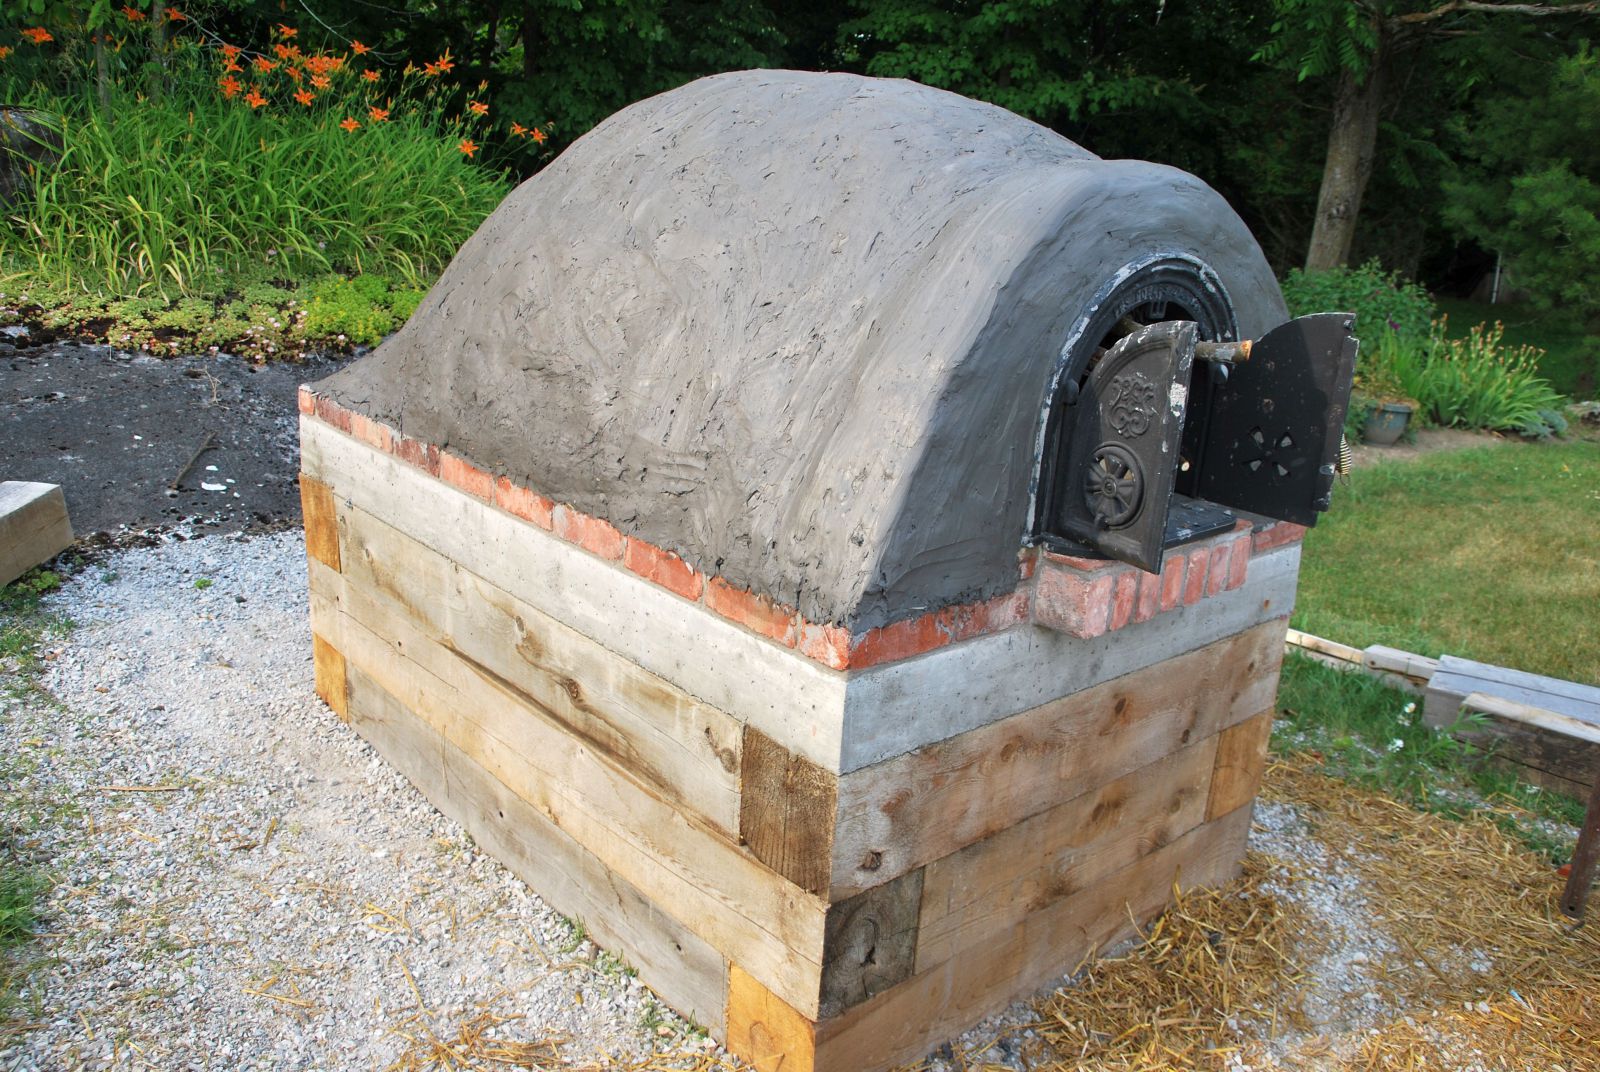
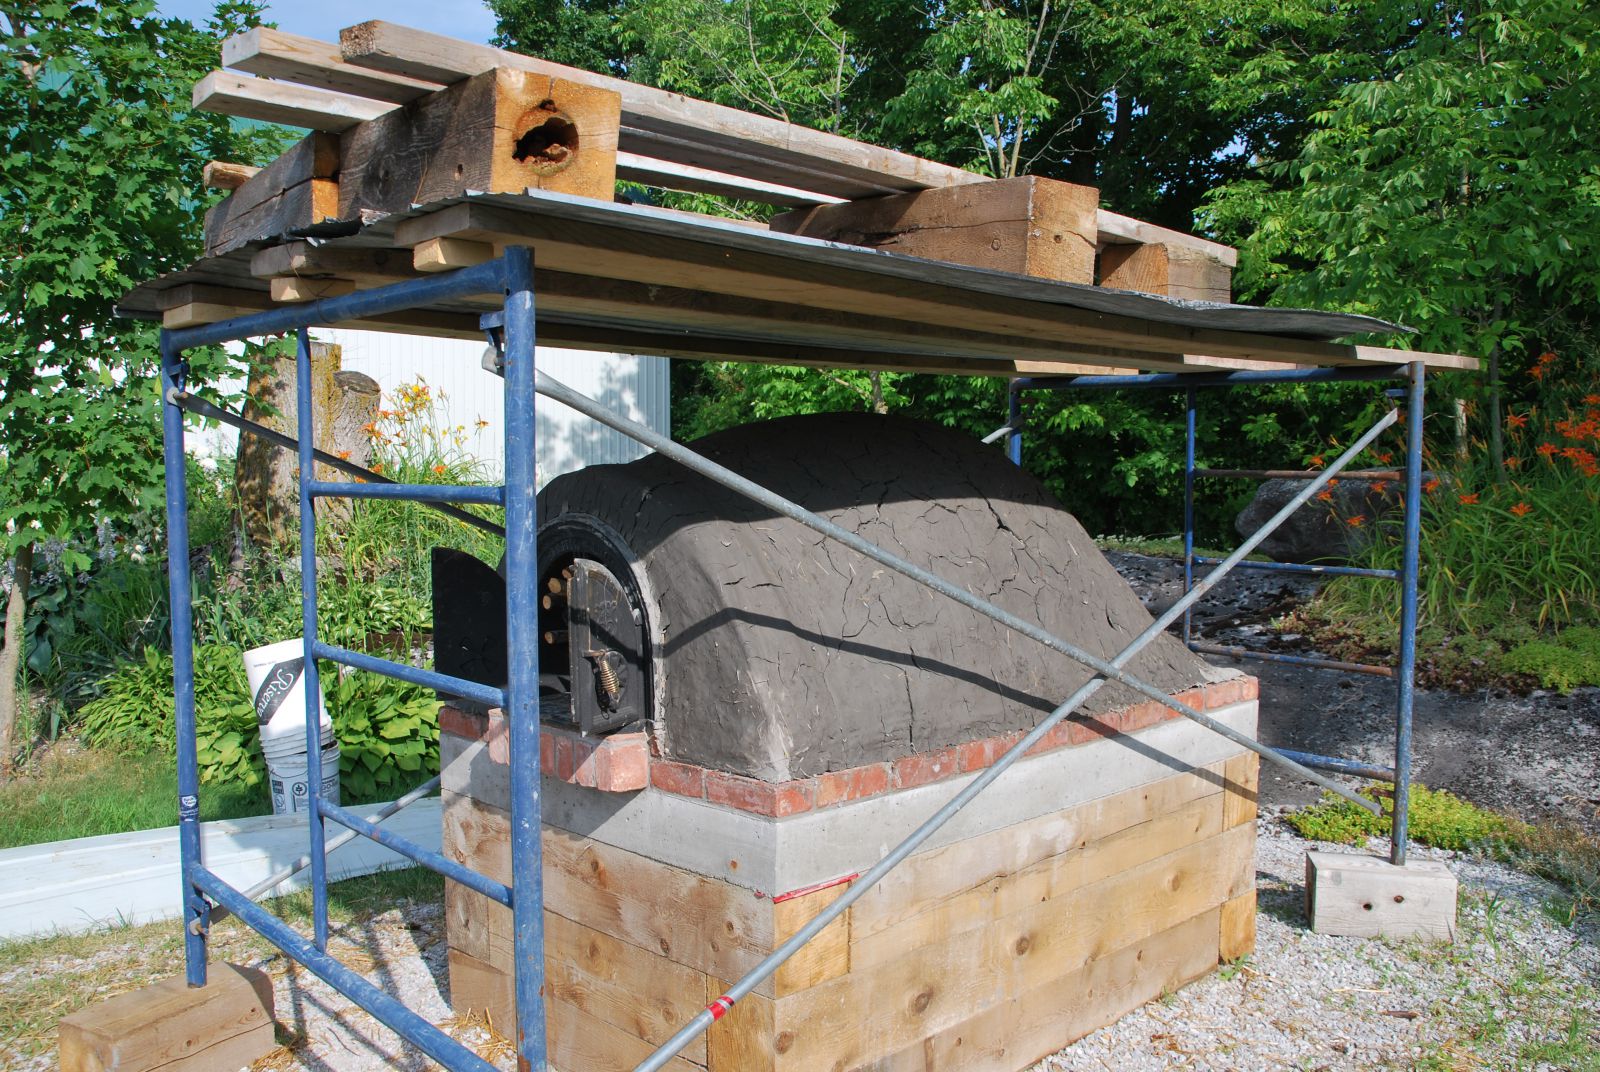
Having been brought up to operating temperature and the final few small cracks filled, a cedar weather canopy is built over the oven.
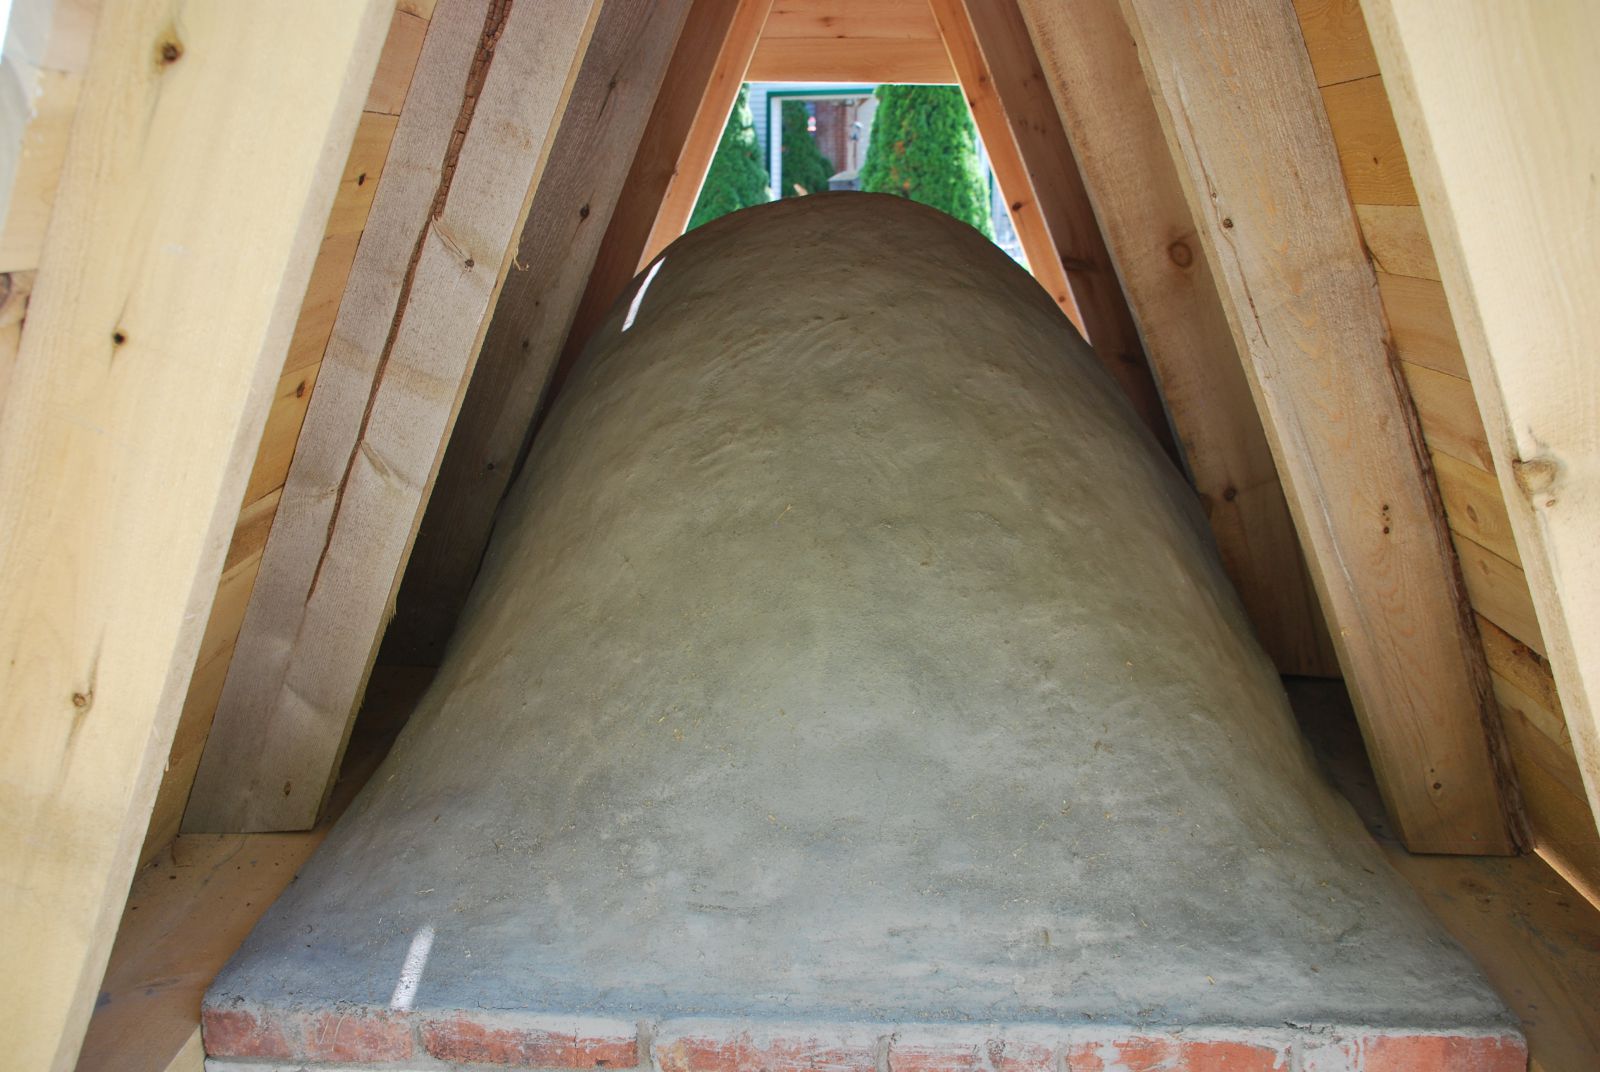
View inside the canopy from the back.
The finished weather canopy.
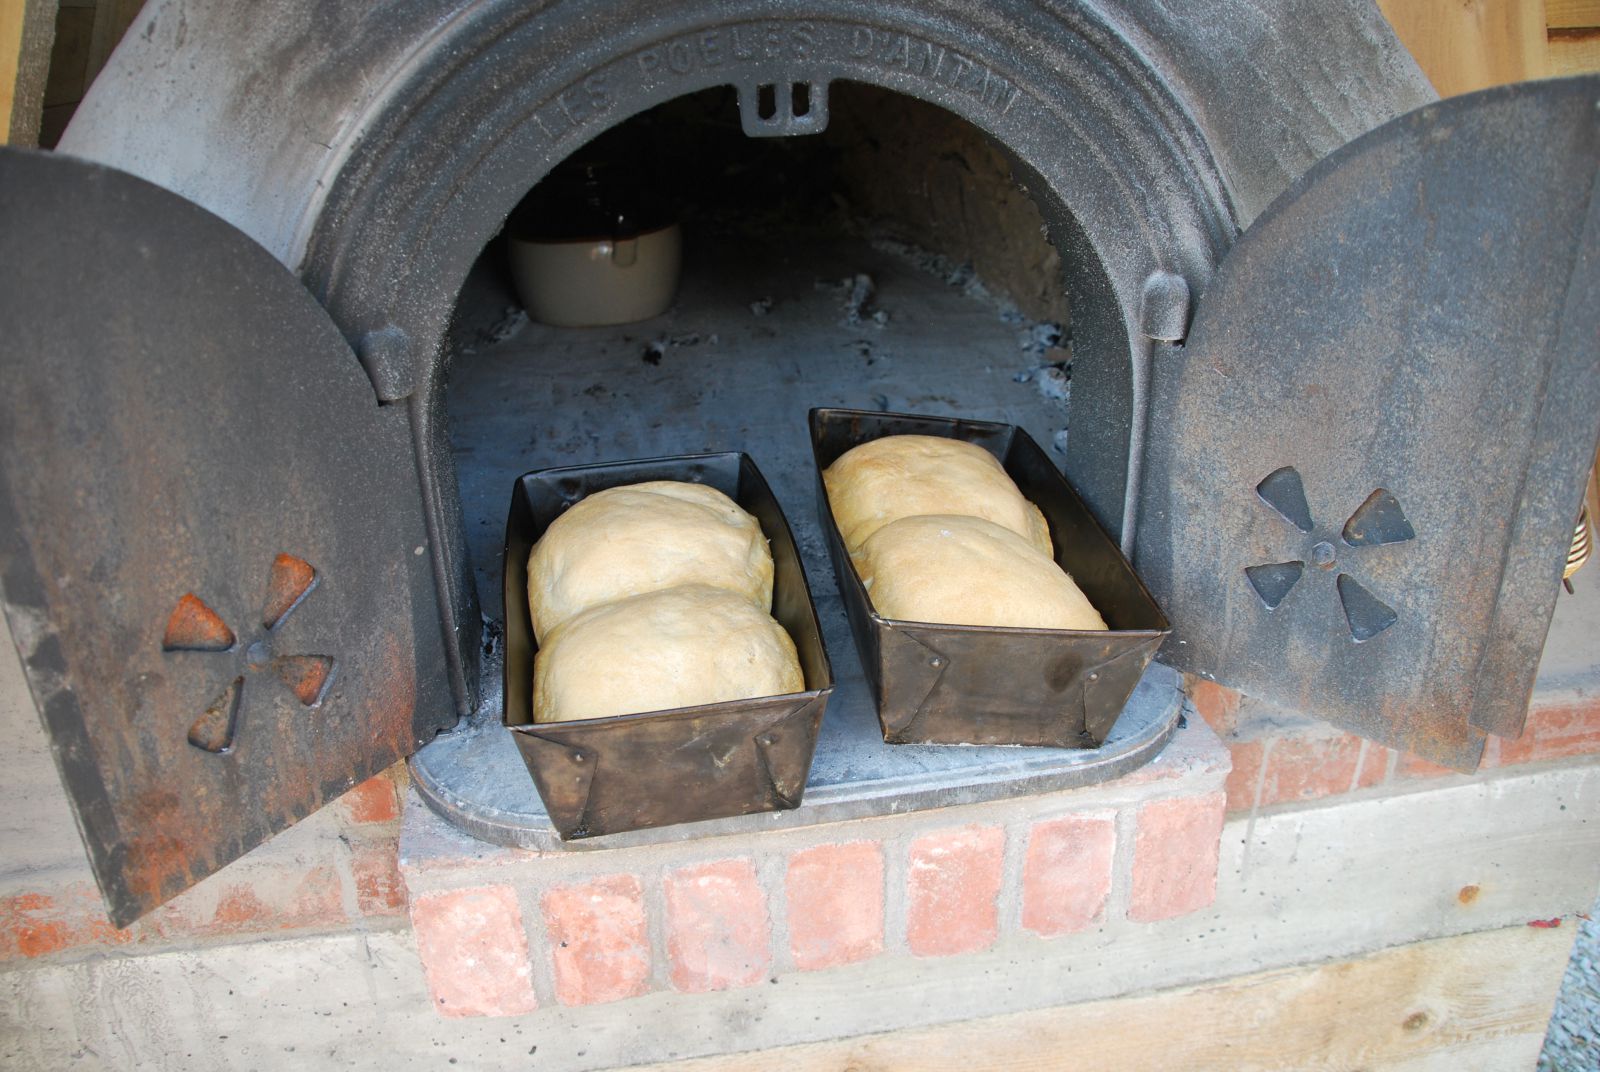
The first two experimental loaves we baked.
.jpg)

.jpg)
.jpg)