This pictorial article is intended to supplement the report Construction Experience of White Upper Chamber Bakeoven Option for Contra-Flow Heaters published in the MHA magazine in 1996. The technique follows plans originally furnished by Norbert Senf. The core shown was built in autumn 2005 in Wakefield, QC.

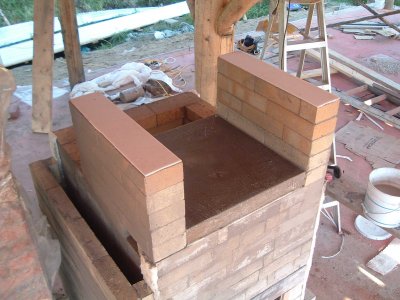
1) The partially constructed core and side channels. The oven's
loading opening will be on the same face as the firebox loading
opening.
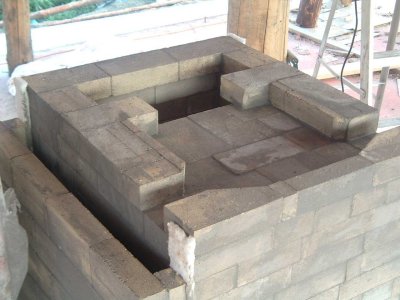
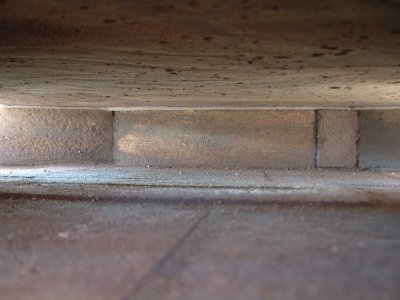
2) Detail of the under-hearth smoke path. The bricks at the front
are cut back 2" to allow the gases to reach as far forward as
possible, thus avoiding a cold spot at the front of the
hearth.

3) The 4 castable refractory concrete elements of the oven cast
in Mount Savage Heatcreat 24 ESC.
Top slab (left),
Hearth slab (middle top),
Back slab (right),
Load relieving lintel (middle bottom).
Top slab (left),
Hearth slab (middle top),
Back slab (right),
Load relieving lintel (middle bottom).
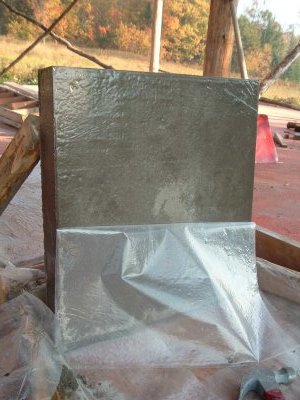
4) The cold side of the hearth slab as the polythene is removed.
If care is taken during casting a smooth impermeable surface can
be obtained.
5) The bed gasket of the hearth slab, in 1/8 inch Rolboard
(ceramic paper) by 'Vesuvius
The ceramic paper used in the oven's construction acts both as a smoke gasket and an expansion gasket.
The ceramic paper used in the oven's construction acts both as a smoke gasket and an expansion gasket.
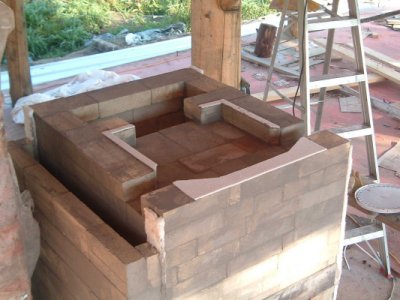
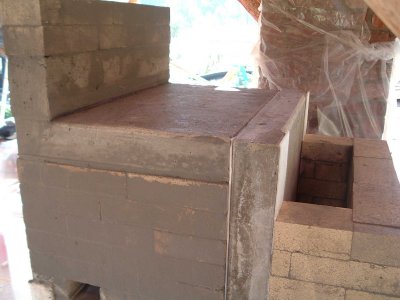
6) The hearth slab in position, gasketed on the sides, ready for
the oven walls to be layed in refractory brick.
The hearth slab must be cast with precision to enable the ceramic paper to form an effective smoke gasket.
The hearth slab must be cast with precision to enable the ceramic paper to form an effective smoke gasket.
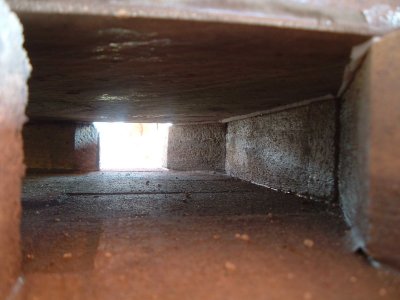
6a) View of under-hearth smoke path through exit opening (left to
right).
6b) View of under-hearth smoke path from the fire tube (back to
front).
7) Oven walls 5 courses high with ceramic paper gaskets, ready
for the installation of the top slab. Brick used here is Maryland
Super Duty, as opposed to High Heat used in the rest of the
core.
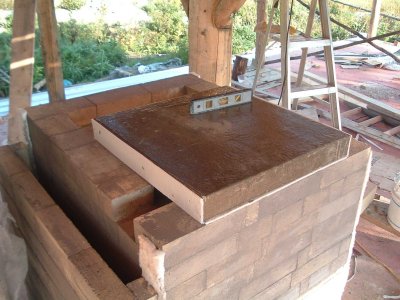
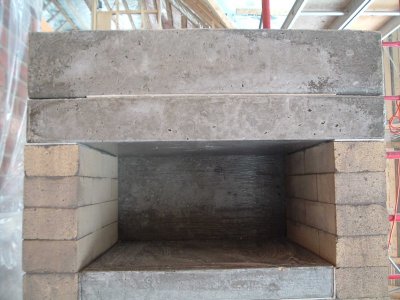
8) Top slab and load relieving lintel plus two courses of brick.
The head and bed surfaces are gasketed ready for installation of
the back slab.
These rear surfaces must be exactly plumb and square for the smoke gasket to be effective.
These rear surfaces must be exactly plumb and square for the smoke gasket to be effective.
9) The back slab is installed, being gasketed on both hot and
cold surfaces. The rear wall of the core is layed in brick,
giving a 6" x 18" fire tube.
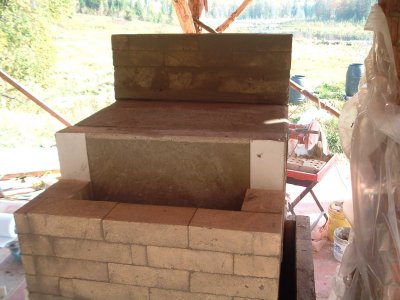
10) View from rear as the back wall of the core is layed up
against the gasketed back slab.
All the castable refractory elements in the oven are free floating.
All the castable refractory elements in the oven are free floating.
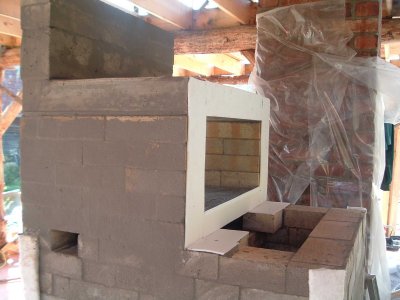
11) View from right of the core before the right hand heat
exchange channel is completed. The rear wall has its side walls
extended slightly to force the gases over the oven towards the
front of the top slab.
The extended side walls also offer additional support for the castable refractory concrete capping slabs.
The extended side walls also offer additional support for the castable refractory concrete capping slabs.
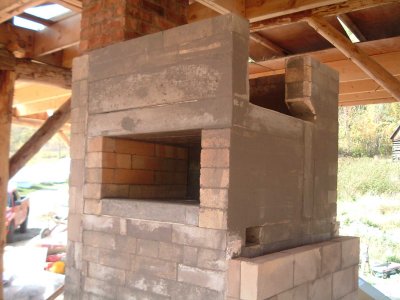
12) The core with completed left heat exchange channel.
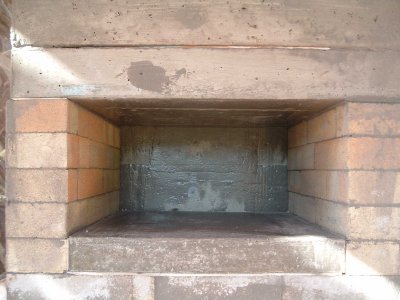
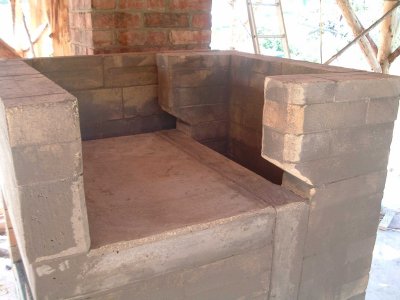
13) The finished bake chamber. The top and rear slabs are cast in
forms made from 2" x 4" spruce studs, the hearth slab with 1" x
21/2" latt, and load relieving lintel with 2" x 6".
The oven's top slab is cast flat to save time and facilitate assembly.
The oven's top slab is cast flat to save time and facilitate assembly.
14) Load relieving lintel: The lintel contacts the slab only at
its extremities. The ceramic paper gasket seen here is placed in
the lintel's mold, under the polythene before casting, thus
leaving a recess in the head of the lintel.
Note 1: This image is from a different project.
Note 2: ESC - Extra Strength Castable.
i.e. Castable refractory concrete with large aggregate chosen for strength and high resistance to thermal shock.
Note 1: This image is from a different project.
Note 2: ESC - Extra Strength Castable.
i.e. Castable refractory concrete with large aggregate chosen for strength and high resistance to thermal shock.
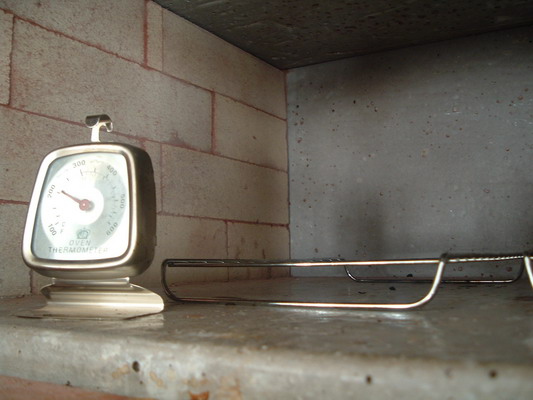
Functioning oven (not the same project).
Pyromasse, Montreal. Jan 2006
