Observations eight years later

The bungalow was built on an island in the St Laurence River during the 1950's
The project was executed in 2000, the heater and cookstove having seen regular daily use.
This was my first visit since completing the project and a courtesy visit rather than a call back from the home owner.
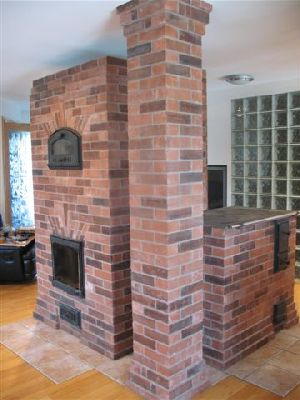
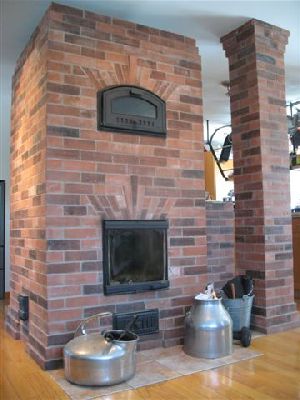
The contra-flow heater and cookstove are accompanied buy a masonry column which supports the roof structure of the bungalow.
Both appliances use the same chimney flue, there being only one shut off damper at 6 feet.
The facing brick are recycled, having first been layed in the late 1890s Mortar used on the facing is type N.
The facing brick are recycled, having first been layed in the late 1890s Mortar used on the facing is type N.
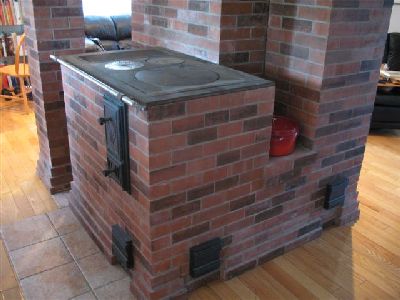
The Finnish style cookstove has no oven, leaving room for a robust fire box.
Building an oven in a cookstove of this size leaves room only for a relatively flimsy fire box.
As the cookstove would be used daily, and the heater would have an oven, it was decided to sacrifice the oven for a stronger fire box.
Building an oven in a cookstove of this size leaves room only for a relatively flimsy fire box.
As the cookstove would be used daily, and the heater would have an oven, it was decided to sacrifice the oven for a stronger fire box.
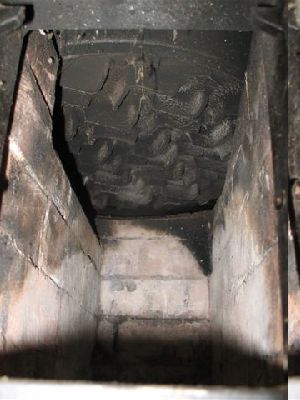
View inside the cookstoves fire box.
Note the heat exchange fins on the bottom of the large hot plate.
Note the heat exchange fins on the bottom of the large hot plate.
In perfect condition after 8 years seasonal use. The fire box walls consist of full brick layed flat.
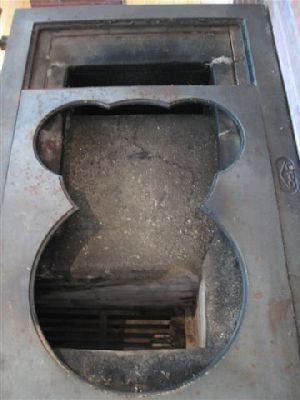
What looks on the image to be a crack, is a bug trail through a thin deposit of fly ash.
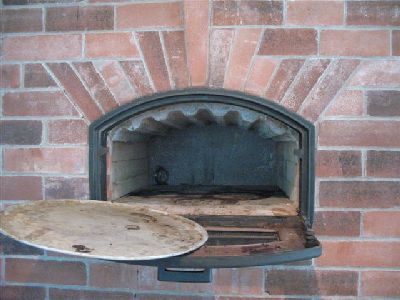
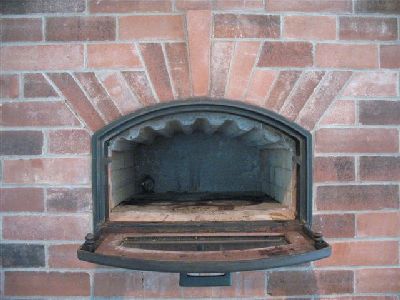
The heaters white upper chamber bake oven has seen regular use.
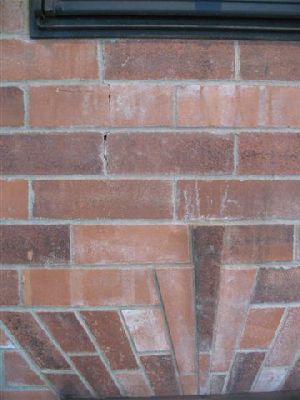
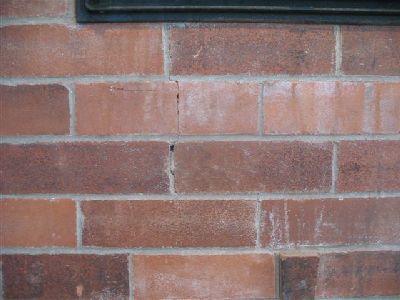
At some point about 6 years ago a hairline crack developed in the facing between the the two doors.
The crack runs up the left side of the key, following the head an bead joints to the left, for two rows above the key, before breaking a brick, and following the head joint above into the oven's opening.
Detail
The fissure continues out of the upper left of the oven opening, in the joint between the first voussoir and the springers. Then it travels left around the corner on the ootherside, always following the bed joint on the top of the first voussoir.
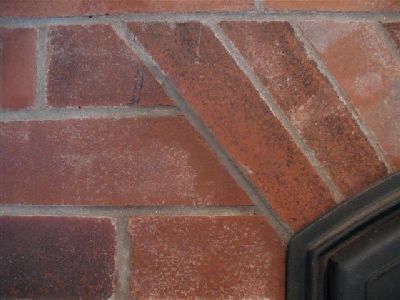
The two joints from which the mortar had fallen from the surface were re filled, though this serves only an aesthetic function.
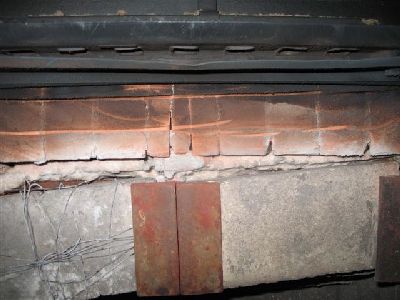
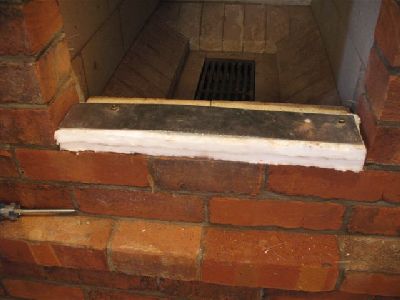
View of the cores lintel and the arch in the facing over the fire box loading opening.
From top to bottom:
The door frame:
Secondary air deflector,
Warped draught slide,
Cast iron door frame.
Bottoms of the voussoir of the arch of the facing,
Ceramic wool Gasket between core and facing.
Fire brick heat shields held in place on the bottom of the angle bar lintel of the core.
The smaller pieces of angle bar holding the heat shield in place are in good condition.
The fire brick heat shield to the left has at some point broken and been held together by a wire sling, made by the home owner.
Note.
The lead edges of the voussoir of the arch are level with the bottom of the lintels heat shields, and are exposed to the fire to such an extent that they have whitened off. Obviously this means that the area of masonry immediately above the top of the fire box door, is receiving a lot of heat fast. What effect this has had on the occurrence of the crack in the facing, is not sure, though it is probably a contributory factor, if not the sole cause.
In this situation I now keep the springing line of the arch as high up above the cores lintel as possible, so reducing direct radiation from the fire. If possible a ceramic wool shield can be held in place by a sheet of stainless steel, screwed into the bottom of the arch.
The following images illustrate the installation of an insulated heat shield on a recent project.
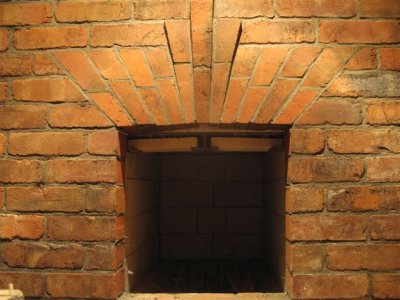
The top of the opening in the facing is in line with the bottom of the angle bar lintle of the core, keeping the bottom of the arche's voussoir high and out of the line of direct radiation. There is also ample room to attach an insulated heat shield to the bottom of the voussoir.
Note. Like the project ilustrated this heater will be fitted with Upos 04851 door, which is ideal for the installation of a heat shield across the bottom of the voussoir.
With other doors, for example Upos 0033. raising the opening in the facing against the opening in the core may cause the bottom of the heat shields to be be seen through the glass of the door.
The heat shield consists of two pieces of 12 inch ceramic wool, held in to place, and protected by a sheet of 20 gauge stainless steel.

The stainless steel sheet is attached to the bottom of the voussoir with two Tapcon screws.
The width of the shield is only 6cm allowing space for the door frame flange at 3cm.
The width of the shield is only 6cm allowing space for the door frame flange at 3cm.
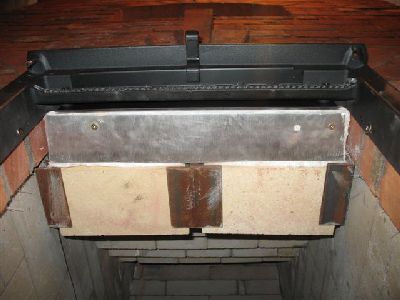
The door frame does not actually touch the shield.
From top:
Note. When firing the heater from cold, the voussoir were still cold to the touch an hour after the fire. Once the heater is fired regularly the voussoir are always quite hot to the touch.
The intention of the heat shield is to allow the voussoir to become hot at the same time as the other areas of the facing, and not to be heated up quickly by direct radiation from the fire.
From top:
- Door frame.
- Insulated heat shield protecting the voussoir
- Fire brick heat shield protecting the lintel of the core
- Corbelled fire box ceiling.
Note. When firing the heater from cold, the voussoir were still cold to the touch an hour after the fire. Once the heater is fired regularly the voussoir are always quite hot to the touch.
The intention of the heat shield is to allow the voussoir to become hot at the same time as the other areas of the facing, and not to be heated up quickly by direct radiation from the fire.
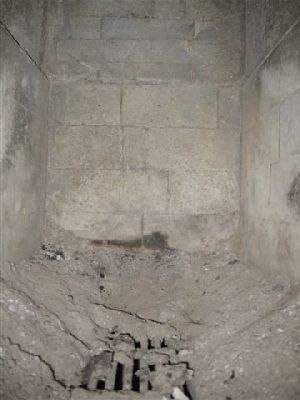
The heaters fire box is in relatively good condition. There are two cracks in the rear wall above the fire box liner. These cracks have apparently remained stable for some time. The brick are AP Greens PCPC layed in 421.
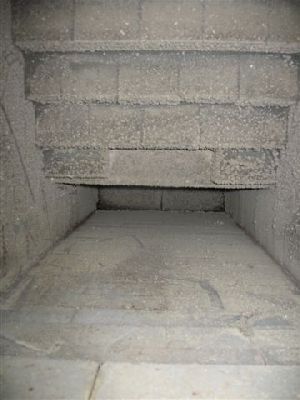
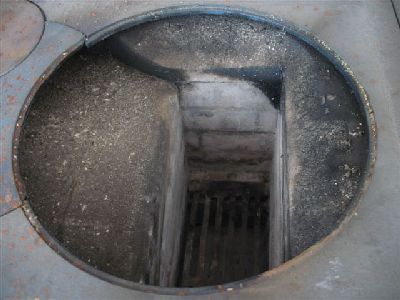
View through the fire tube.
The fissure in question is relatively unnoticeable and has not wandered or widened since its occurrence.
The home owner is, in his own words, 100% satisfied with his investment. He was not worried about the crack, claiming it happened when a dish boiled over in the oven. I doubt this though.
For a more detailed discussion of hairline cracking in the facing see MHA discussion on this subject
Marcus Flynn
2008
